前言
好久没有写过新东西了,实在是年关在即,太忙了,抽不出身来写。
眼看着马上就要过年了,还是挤出点时间写一个和即将到来的新春有关的效果。
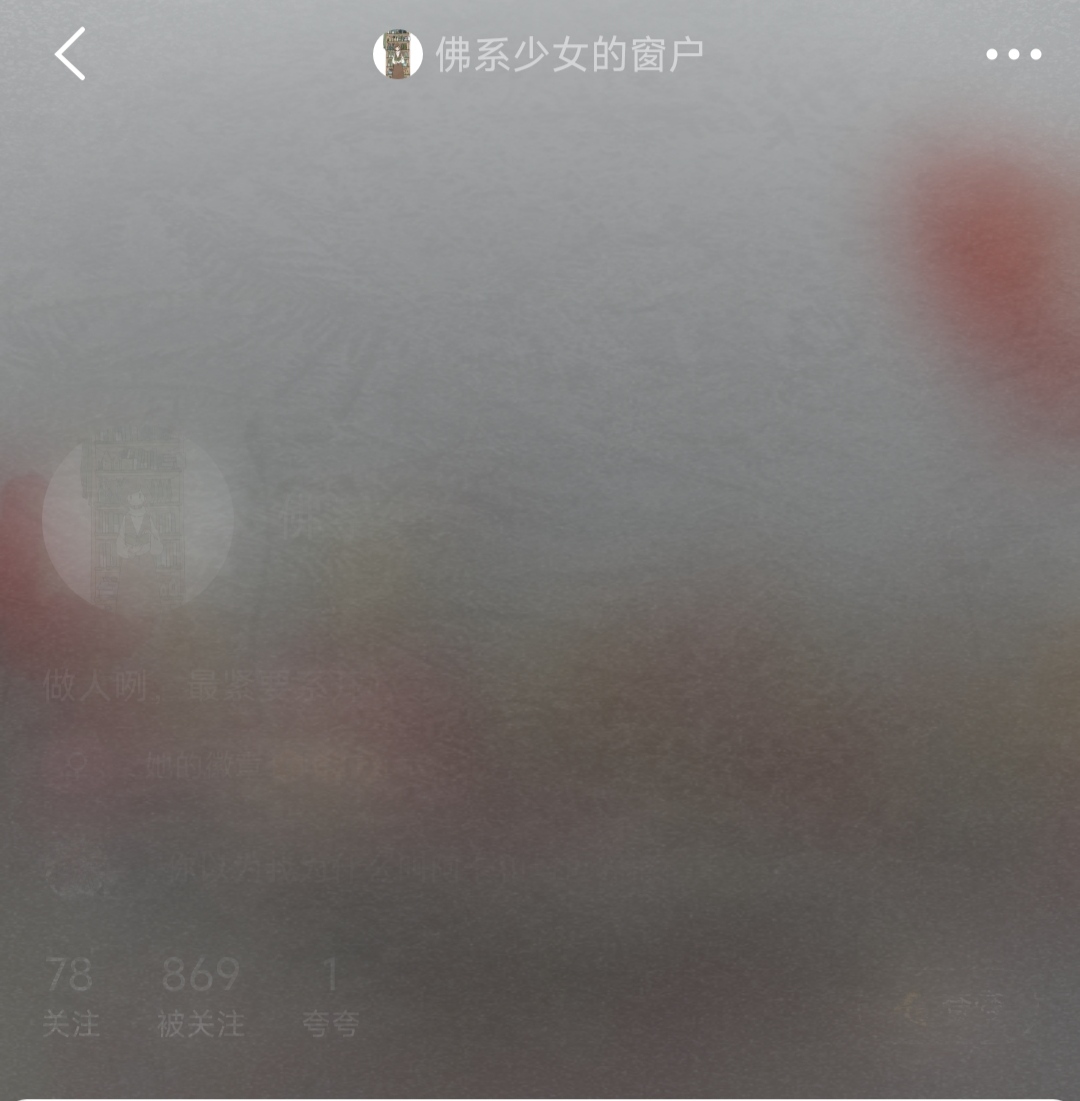
这个效果灵感来源于即刻的新春活动,即刻在新春推出了一个将个人主页“模糊化”,模仿起雾的窗户,其他人可以在别人的“窗户”上自由涂鸦,像极了童年冬日我们用手指在窗户上涂涂画画的感觉,我愿称之为赛博窗花。
恰逢新春,不如我们也实现一个这种效果的 Compose 组件,然后,为自己画上一条龙吧。
首先我们来看下效果对比:
- 这是即刻的原窗户和我随便涂了几笔的效果:
| 原图 | 涂鸦后 |
|---|---|
 |
 |
- 这是我仿的效果:
| 画个龙宝宝 | 自由涂鸦 |
|---|---|
 |
 |
哈哈哈,上面画的龙宝宝可能看起来不太明显,但是我画的其实是这样的萌萌哒的龙宝宝:

虽然我画图技术属实不太行,但是不影响咱们的效果嘛,下面我们就来看看这个效果是怎么实现的。
叠加模糊背景
首先,我们定义一个 Composable 组件 BlurView :
@Composable
fun BlurView(
    paintWidth: Dp = 15.dp, blurRadius: Dp = 10.dp, content: @Composable () -> Unit,
) { }
该组件接受一个名为 content 的 Composable 函数,即需要叠加上模糊效果以及支持涂鸦的内容,而 paintWidth 和 blurRadius 则分别是涂鸦时的画笔宽度以及模糊内容半径。
我们首先需要实现模糊传入的 content ,这个其实非常好实现,因为 Compose 官方自己就支持一个名为 blur 的修饰符,所以我们直接调用就行。
但是有一点需要注意,这个修饰符仅在 Android 12 及其以上的 Android 版本才支持,如果有需要兼容旧版本安卓的话,需要自行实现模糊效果,这里我们就不做兼容了,感兴趣的可以试一下。另外推荐一个模糊效果兼容库,但是它是基于原生 View 实现的,不过可以学习一下它的原理思想: BlurView
综上所述,我们容易想到,直接这样写:
fun BlurView(
    paintWidth: Dp = 15.dp, blurRadius: Dp = 10.dp, content: @Composable () -> Unit,
) {
        Column(
            modifier = Modifier
                .fillMaxSize()
                .blur(blurRadius)
        ) {
            content()
        }
}
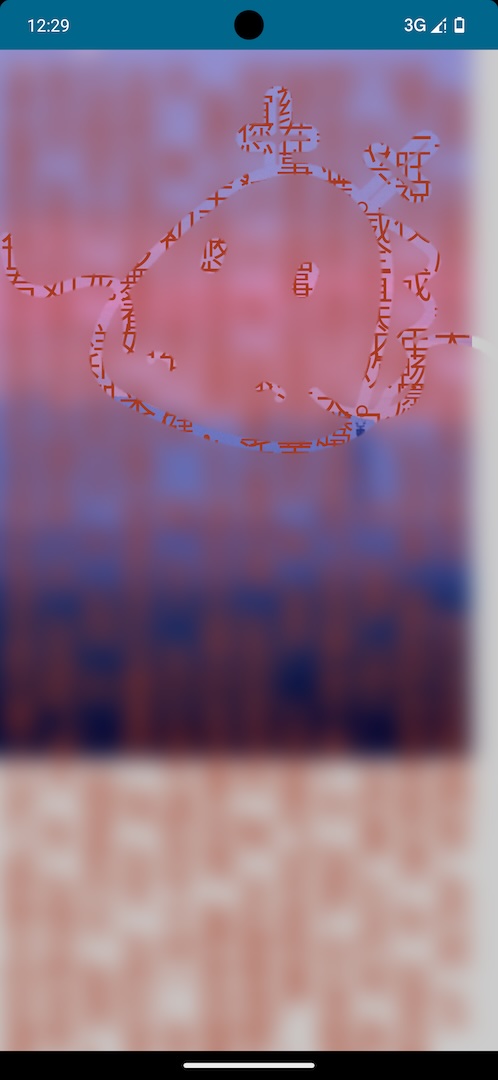
接下来随便写一个页面来看下效果:
BlurView {
Box(
modifier = Modifier
.fillMaxSize()
.background(
color = Color.LightGray
)
) {
Image(painter = painterResource(id = R.drawable.screen_2), contentDescription = "")
Text(
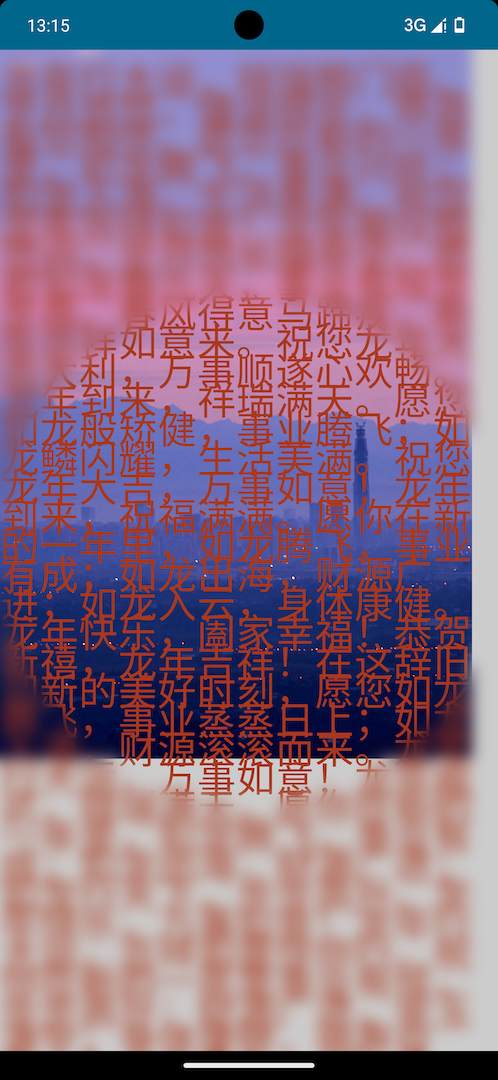
text = "龙年行大运,祥瑞照门庭。岁月悠悠,情谊绵长,感恩有您相伴。愿您在新的一年里,如龙腾飞,事业兴旺;如龙入海,生活美满。祝您龙年吉祥如意!龙年威仪照世间,岁月悠长福寿全。愿君如龙舞九天,事业有成步步高。春风得意马蹄疾,新年吉祥如意来。祝您龙年大吉大利,万事顺遂心欢畅。龙年到来,祥瑞满天。愿您如龙般矫健,事业腾飞;如龙鳞闪耀,生活美满。祝您龙年大吉,万事如意!龙年到来,祝福满满。愿你在新的一年里,如龙腾飞,事业有成;如龙出海,财源广进;如龙入云,身体康健。龙年快乐,阖家幸福!恭贺新禧,龙年吉祥!在这辞旧迎新的美好时刻,愿您如龙腾飞,事业蒸蒸日上;如龙入海,财源滚滚而来。龙年行大运,万事如意!龙年威武,祥瑞满天。愿你在新的一年里,如龙腾飞,事业有成;如龙出海,财源广进;如龙行天下,步步高升。龙年快乐,万事如意!龙年行大运,吉祥如意伴你行。祝你在新的一年里事业有成,步步高升;财源广进,金玉满堂;身体康健,福寿双全。龙年大吉,万事胜意!亲爱的XXX,龙年到来之际,祝你如龙腾飞,事业有成;如龙般坚韧,无惧挑战;如龙般幸运,步步高升。龙年快乐,万事胜意!",
fontSize = 32.sp,
color = Color(170, 56, 30)
)
}
}
效果如下:

可以看到,确实很好的模糊掉了我们的显示内容,但是事实上,我们不仅是需要简单的模糊掉内容,而是需要叠加一层模糊效果,并且该效果应该支持通过某种方式自由的裁切掉,“漏出”未被模糊的内容,从而实现咱们的在窗户上涂鸦的效果。
通过上面的描述,我们很容易想到,可以通过 Box 叠加一层模糊后的图层,再在底部显示未被模糊的内容:
Box{

    // 原内容放到底层
    Column {
        content()
    }


    // 模糊后的内容叠加上去
    Column(
        modifier = Modifier
            .fillMaxSize()
            .blur(blurRadius)
    ) {
        content()
    }
}
那么如何在叠加上的模糊图层中“抠出”一个洞来显示底部的原图层呢?
其实也不难实现,我们这里可以用到 Compose 的自定义绘制功能,绘制出想要抠出的形状后,通过特定的混合模式,实现“抠图”效果。
例如,我们想抠出一个圆形,那么我们可以首先这样在模糊图层绘制一个圆形:
Box{

    // 原内容放到底层
    Column {
        content()
    }


    // 模糊后的内容叠加上去
    Column(
        modifier = Modifier
            .fillMaxSize()
            .blur(blurRadius)
            .drawWithContent {

                // 绘制出原画布内容(即模糊后的图层)
                drawContent()

                // 绘制一个圆形
                drawCircle(
                    Color.White,
                )

            }
    ) {
        content()
    }
}
上面涉及到了 Compose 绘制中的几个概念,这里不再赘述,不清楚的可以看我之前的文章,其中有详细解释:Compose 绘制 。
上述代码实现效果如下:
可以看到,虽然圆形是画出来了,但是也被模糊了,且就算没被模糊也不是我们想要的抠出图像的效果。
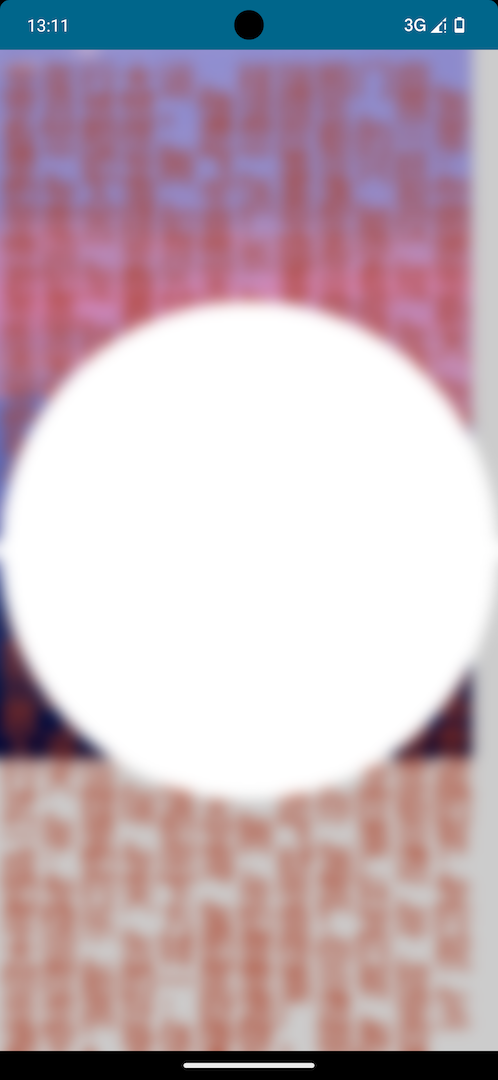
别急,此时只需要改一下混合模式即可:
// ……

// 绘制一个圆形
drawCircle(
    Color.White,
    // 指定混合模式为 BlendMode.DstOut
    blendMode = BlendMode.DstOut
)

// ……
此时效果为:
可以看到,现在已经达到了我们的预想效果。
扩展: 简单解释一下为什么添加了这个混合模式就达到了我们的效果,首先看官方对 DstOut 的解释:
Show the destination image, but only where the two images do not overlap. The source image is not rendered, it is treated merely as a mask. The color channels of the source are ignored, only the opacity has an effect.
To show the source image instead, consider SrcOut.
To reverse the semantic of the mask (only showing the destination where the source is present, rather than where it is absent), consider DstIn.
This corresponds to the “Destination out Source” Porter-Duff operator.
简单理解就是使用这个混合模式之后,将只显示叠加图像没有和源图像重合的部分,并且源图像不会被渲染,只渲染叠加图像。
在这里,我们的叠加图像即为模糊后的图层,而源图像则为绘制的圆形。
与之对应的是:
- DstIn - 只显示叠加图像和源图像重合的部分,并且源图像不会被渲染,只渲染叠加图像。
- SrcIn - 只显示叠加图像和源图像重合的部分,并且叠加图像不会被渲染,只渲染源图像。
- SrcOut - 只显示叠加图像没有和源图像重合的部分,并且叠加图像不会被渲染,只渲染源图像。
不同的叠加模式效果图:
- DstOut

- DstIn

- SrcOut

- SrcIn

原始输入的是这两个图片:

在 Compose 绘制中,支持 29 种不同的混合模式,几乎能够覆盖我们的所有需求了,具体可以看官方文档:BlendMode
自由绘制
经过上面的步骤,我们已经有了实现我们预定效果的基础,下面就是需要实现用户自由绘制后按照绘制的内容“抠出”模糊图像。
首先,为了实现自由绘制,必不可少的当然是需要监听手势操作,这里我们直接用一个其他大佬写好的工具类:
/**
 * @author SmartToolFactory
 *
 * from: https://github.com/SmartToolFactory/Compose-Drawing-App
 * */
suspend fun AwaitPointerEventScope.awaitDragMotionEvent(
    onTouchEvent: (MotionEvent, PointerInputChange) -> Unit
) {
    // Wait for at least one pointer to press down, and set first contact position
    val down: PointerInputChange = awaitFirstDown()
    onTouchEvent(MotionEvent.Down, down)

    var pointer = down

    // 🔥 Waits for drag threshold to be passed by pointer
    // or it returns null if up event is triggered
    val change: PointerInputChange? =
        awaitTouchSlopOrCancellation(down.id) { change: PointerInputChange, over: Offset ->
            // 🔥🔥 If consumePositionChange() is not consumed drag does not
            // function properly.
            // Consuming position change causes change.positionChanged() to return false.
            change.consumePositionChange()
        }

    if (change != null) {
        // 🔥 Calls  awaitDragOrCancellation(pointer) in a while loop
        drag(change.id) { pointerInputChange: PointerInputChange ->
            pointer = pointerInputChange
            onTouchEvent(MotionEvent.Move, pointer)
        }

        // All of the pointers are up
        onTouchEvent(MotionEvent.Up, pointer)
    } else {
        // Drag threshold is not passed and last pointer is up
        onTouchEvent(MotionEvent.Up, pointer)
    }
}

fun Modifier.dragMotionEvent(onTouchEvent: (MotionEvent, PointerInputChange) -> Unit) = this.then(
    Modifier.pointerInput(Unit) {
        forEachGesture {
            awaitPointerEventScope {
                awaitDragMotionEvent(onTouchEvent)
            }
        }
    }
)


suspend fun AwaitPointerEventScope.awaitDragMotionEvent(
    onDragStart: (PointerInputChange) -> Unit = {},
    onDrag: (PointerInputChange) -> Unit = {},
    onDragEnd: (PointerInputChange) -> Unit = {}
) {
    // Wait for at least one pointer to press down, and set first contact position
    val down: PointerInputChange = awaitFirstDown()
    onDragStart(down)

    var pointer = down

    // 🔥 Waits for drag threshold to be passed by pointer
    // or it returns null if up event is triggered
    val change: PointerInputChange? =
        awaitTouchSlopOrCancellation(down.id) { change: PointerInputChange, over: Offset ->
            // 🔥🔥 If consumePositionChange() is not consumed drag does not
            // function properly.
            // Consuming position change causes change.positionChanged() to return false.
            change.consumePositionChange()
        }

    if (change != null) {
        // 🔥 Calls  awaitDragOrCancellation(pointer) in a while loop
        drag(change.id) { pointerInputChange: PointerInputChange ->
            pointer = pointerInputChange
            onDrag(pointer)
        }

        // All of the pointers are up
        onDragEnd(pointer)
    } else {
        // Drag threshold is not passed and last pointer is up
        onDragEnd(pointer)
    }
}

fun Modifier.dragMotionEvent(
    onDragStart: (PointerInputChange) -> Unit = {},
    onDrag: (PointerInputChange) -> Unit = {},
    onDragEnd: (PointerInputChange) -> Unit = {}
) = this.then(
    Modifier.pointerInput(Unit) {
        forEachGesture {
            awaitPointerEventScope {
                awaitDragMotionEvent(onDragStart, onDrag, onDragEnd)
            }
        }
    }
)

enum class MotionEvent {
    Idle, Down, Move, Up
}
现在,我们只需要为需要监听手势的 Composable 添加 dragMotionEvent 修饰即可监听手势:
var motionEvent by remember { mutableStateOf(MotionEvent.Idle) }
    var currentPosition by remember { mutableStateOf(Offset.Unspecified) }
    var previousPosition by remember { mutableStateOf(Offset.Unspecified) }

    Box(
        modifier = Modifier.dragMotionEvent(
            onDragStart = { pointerInputChange ->
                motionEvent = MotionEvent.Down
                currentPosition = pointerInputChange.position
                pointerInputChange.consumeDownChange()

            },
            onDrag = { pointerInputChange ->
                motionEvent = MotionEvent.Move
                currentPosition = pointerInputChange.position

                pointerInputChange.consumePositionChange()

            },
            onDragEnd = { pointerInputChange ->
                motionEvent = MotionEvent.Up
                pointerInputChange.consumeDownChange()
            },
        ),
    )
接下来,根据手势获取到的坐标信息,在绘制时通过 Path 实时绘制用户的手势轨迹:
.drawWithCache {
                    val currentPath = Path()

                    onDrawWithContent {
                        with(drawContext.canvas.nativeCanvas) {
                            val checkPoint = saveLayer(null, null)

                            when (motionEvent) {

                                MotionEvent.Down -> {
                                    currentPath.moveTo(currentPosition.x, currentPosition.y)

                                    previousPosition = currentPosition

                                }

                                MotionEvent.Move -> {
                                    currentPath.quadraticBezierTo(
                                        previousPosition.x,
                                        previousPosition.y,
                                        (previousPosition.x + currentPosition.x) / 2,
                                        (previousPosition.y + currentPosition.y) / 2
                                    )

                                    previousPosition = currentPosition
                                }

                                MotionEvent.Up -> {
                                    currentPath.lineTo(currentPosition.x, currentPosition.y)

                                    currentPosition = Offset.Unspecified
                                    previousPosition = currentPosition
                                    motionEvent = MotionEvent.Idle
                                }

                                else -> Unit
                            }


                            drawContent()

                            drawPath(
                                currentPath, color = Color.White, alpha = 1f,
                                style = Stroke(
                                    width = paintWidth.toPx(),
                                ),
                                blendMode = BlendMode.DstOut,
                            )

                            restoreToCount(checkPoint)
                        }
                    }
                },
在上述代码中,我们在手势移动时,通过二阶贝塞尔曲线 currentPath.quadraticBezierTo() 绘制出用户的手势轨迹,然后再通过 drawPath() 将这个轨迹绘制出来,并且将混合模式设置为 BlendMode.DstOut ,这样,就实现了自由绘制模糊图层,并且绘制的内容是抠除模糊图层,显示出底下的原始图层,效果如下:
扩展与结语
实现了我们想要的效果之后,当然需要画上我们契合龙年主题的涂鸦了,这里我们就在网上找了一个龙宝宝的图片:
然后,照着画上去?
不不不,就我这水平怎么可能画的出来这么好看的图像呢?我们当然是采用直接导入的方式咯。
有两种导入方式,第一种比较简单也比较适合稍微复杂点的图像,那就是直接把上面代码中的绘制 Path 改成绘制图像,然后叠加即可,但是需要注意,叠加的图像背景必须是透明的:
// ……

val imageBitmap = ImageBitmap.imageResource(id = R.drawable.dragon_3)

// ……

drawImage(
    image = imageBitmap,
    blendMode = BlendMode.DstOut
)

// ……
第二种方式比较复杂,那就是可以将 SVG 图片转为转为绘制的 Path:
首先以文本方式打开 SVG 文件,就能看到图像的路径信息包含在 path 标签中,例如:
<?xml version="1.0" standalone="no"?><!DOCTYPE svg PUBLIC "-//W3C//DTD SVG 1.1//EN" "http://www.w3.org/Graphics/SVG/1.1/DTD/svg11.dtd"><svg t="1706427697349" class="icon" viewBox="0 0 1305 1024" version="1.1" xmlns="http://www.w3.org/2000/svg" p-id="2158" xmlns:xlink="http://www.w3.org/1999/xlink" width="254.8828125" height="200"><path d="M567.374376 424.252912a26.5797 26.5797 0 0 0-34.076539 17.379035l-14.652912 45.321797a26.920466 26.920466 0 0 0 17.379035 34.076539 26.920466 26.920466 0 0 0 34.076539-17.379035l14.652912-45.321797a26.920466 26.920466 0 0 0-17.379035-34.076539zM808.636273 570.78203l14.652912-45.321797a26.920466 26.920466 0 0 0-17.379035-34.076539 27.261231 27.261231 0 0 0-34.076539 17.379035l-14.312147 45.321797a26.68193 26.68193 0 1 0 50.774043 16.356739zM396.991681 739.120133a19.082862 19.082862 0 0 0-13.289851 8.178369 25.216639 25.216639 0 0 0-3.066888 19.764393 9.882196 9.882196 0 0 0 11.926788 7.837604 10.222962 10.222962 0 0 0 8.17837-11.926789c0-2.385358 0-3.748419-1.703827-3.748419a46.003328 46.003328 0 0 1 29.646589 8.519135 21.46822 21.46822 0 0 1 6.133777 16.356739 9.882196 9.882196 0 0 0 10.222962 9.882196 10.222962 10.222962 0 0 0 10.222961-9.882196 40.891847 40.891847 0 0 0-12.608319-31.009651 65.426955 65.426955 0 0 0-45.662562-13.971381zM695.161398 824.652246a42.595674 42.595674 0 0 0-32.031947 9.882197 10.563727 10.563727 0 0 0 0 14.312146 9.882196 9.882196 0 0 0 14.312146 0 21.127454 21.127454 0 0 1 16.356739-5.452246 45.662562 45.662562 0 0 1 24.875874 16.356739l-3.407654 2.385357a10.222962 10.222962 0 0 0 4.770715 19.082862 10.904493 10.904493 0 0 0 4.770716 0 24.535108 24.535108 0 0 0 12.949085-14.652912 19.423627 19.423627 0 0 0-2.385358-16.356738 68.153078 68.153078 0 0 0-40.210316-25.557405z" p-id="2159"></path><path d="M1303.427621 748.320799a145.166057 145.166057 0 0 0-95.755075-55.203994 159.818968 159.818968 0 0 0-117.56406 10.563727 49.070216 49.070216 0 0 0-15.334443 20.105159 170.382696 170.382696 0 0 0-10.563727-18.060566 132.557737 132.557737 0 0 0 62.019301-63.723128c11.245258-34.076539-14.993677-68.153078-37.484193-89.621298a87.917471 87.917471 0 0 0 49.410982-53.500167c18.742097-56.22629-113.815641-125.742429-154.707488-145.506822a10.904493 10.904493 0 0 0-7.156073 0l-2.044592-3.407653 51.455574-56.22629 25.557404 23.172047a38.506489 38.506489 0 0 0 27.261232 7.837604 38.165724 38.165724 0 0 0 27.261231-12.60832 38.506489 38.506489 0 0 0 10.222962-27.942762 39.528785 39.528785 0 0 0-12.60832-27.261231l-24.875873-22.149751 47.707154-51.796339a34.076539 34.076539 0 0 0-2.385357-49.751747 34.076539 34.076539 0 0 0-49.410982 2.385358l-47.366389 52.818635-25.557405-23.172046a39.18802 39.18802 0 0 0-52.818635 57.248585l25.557404 23.512812-42.595674 44.640267a292.376705 292.376705 0 0 0-65.76772-49.751748 204.459235 204.459235 0 0 0-112.111814-26.238935v-31.00965h34.076539a39.18802 39.18802 0 1 0 0-78.37604h-34.076539V35.098835a35.098835 35.098835 0 1 0-70.197671 0v70.197671h-34.076539a39.18802 39.18802 0 0 0 0 78.37604h34.076539v43.277204a389.835607 389.835607 0 0 0-133.580033 74.968386 1462.905824 1462.905824 0 0 0-235.468885 244.328786c-2.726123-2.385358-4.770715-5.111481-7.496839-7.156073-30.668885-21.808985-76.672213-19.423627-153.344426 8.519134A88.939767 88.939767 0 0 1 68.153078 545.224626C25.216639 511.148087 30.668885 423.912146 30.668885 422.88985a14.652912 14.652912 0 0 0-13.971381-16.015973 14.312146 14.312146 0 0 0-10.904492 3.407654 16.015973 16.015973 0 0 0-5.452247 10.563727c0 4.42995-6.815308 105.978037 49.410982 148.57371a115.519468 115.519468 0 0 0 114.497171 6.815308c65.08619-23.853577 102.229617-27.601997 124.720134-12.267554a34.076539 34.076539 0 0 1 7.837604 7.837604 317.593344 317.593344 0 0 0-65.08619 189.806323 158.455907 158.455907 0 0 0 88.258236 125.401664c116.882529 68.153078 291.013644 136.306156 430.045924 136.306156a283.17604 283.17604 0 0 0 98.140432-16.015973h4.089185a245.351082 245.351082 0 0 0 128.468552-78.37604l22.149751-4.089185c94.732779-23.172047 94.732779-96.09584 94.732778-144.484526 0-23.512812 0-45.662562 9.882197-52.818635a132.557737 132.557737 0 0 1 92.688186-5.452246 123.697837 123.697837 0 0 1 75.649917 40.210316 15.675208 15.675208 0 0 0 20.786689 6.133777 14.993677 14.993677 0 0 0 7.156073-9.200666 17.03827 17.03827 0 0 0-0.340765-10.904492zM951.757737 314.526456l55.203993-60.315474a15.334443 15.334443 0 0 0 0-21.46822l-36.461896-34.076539a8.519135 8.519135 0 0 1 0-11.926789 9.200666 9.200666 0 0 1 12.267554 0l36.461897 34.076539a15.334443 15.334443 0 0 0 21.468219 0l57.930117-63.041597a4.770715 4.770715 0 0 1 6.474542 0 5.111481 5.111481 0 0 1 0 6.815308l-60.65624 60.656239a16.015973 16.015973 0 0 0 0 21.808985l36.461897 34.07654a8.8599 8.8599 0 0 1 0 12.267554 10.222962 10.222962 0 0 1-6.133777 2.726123 11.586023 11.586023 0 0 1-6.133777-2.385358l-36.461897-34.076539a15.675208 15.675208 0 0 0-10.904492-4.089185 15.334443 15.334443 0 0 0-10.563727 4.770716l-56.22629 61.33777-5.793011-7.156073z m-252.84792-160.159734h-49.751747a8.519135 8.519135 0 0 1 0-17.038269h49.751747a15.334443 15.334443 0 0 0 15.334443-17.03827v-85.191348a4.42995 4.42995 0 0 1 4.42995-4.42995 4.42995 4.42995 0 0 1 4.770715 4.42995v85.191348a15.334443 15.334443 0 0 0 15.334443 15.334443h49.410981a8.519135 8.519135 0 0 1 0 17.038269h-50.433277a15.334443 15.334443 0 0 0-15.334443 15.334443v49.410981l-9.200666 1.703827V168.338103a15.334443 15.334443 0 0 0-14.312146-13.971381zM334.972379 860.432612a128.809318 128.809318 0 0 1-72.923793-102.229617 270.56772 270.56772 0 0 1 49.410981-153.685191 529.549418 529.549418 0 0 1 6.815308 124.720133 15.334443 15.334443 0 0 0 4.089185 10.904492 15.334443 15.334443 0 0 0 10.904492 4.770716 15.334443 15.334443 0 0 0 15.334443-14.652912 387.109484 387.109484 0 0 0-16.356739-158.115141 1349.430948 1349.430948 0 0 1 238.535774-247.395674 303.962729 303.962729 0 0 1 191.51015-80.761398 165.952745 165.952745 0 0 1 89.280532 22.831281c204.459235 113.474875 131.535441 389.835607 77.694509 591.909484l-7.496838 28.283528c0 4.089185-3.066889 7.496839-4.42995 11.245258a138.009983 138.009983 0 0 1-90.302829-52.137105 17.379035 17.379035 0 0 0-9.541431-6.815308 17.03827 17.03827 0 0 0-11.586023 2.044592 15.334443 15.334443 0 0 0-4.770716 21.127455 170.382696 170.382696 0 0 0 102.229618 64.404659 126.42396 126.42396 0 0 1-59.293178 50.092512c-120.630948 51.114809-342.469218-21.808985-509.103495-116.541764z m601.11015 71.901498z m60.315474-89.621298a16.015973 16.015973 0 0 0-5.793011 6.815308v2.726123a141.758403 141.758403 0 0 1-24.194343 48.729451h-17.379035a39.18802 39.18802 0 0 1 2.044592-5.793012l7.496839-28.283527c37.484193-140.054576 87.917471-329.520133 37.143428-473.663894 62.700832 34.076539 120.290183 78.035275 114.497171 95.755075a60.997005 60.997005 0 0 1-47.707155 40.210316h-5.793011a14.993677 14.993677 0 0 0-13.289851 10.904493 15.334443 15.334443 0 0 0 5.452247 16.356739c22.490516 17.379035 55.885524 52.818636 48.388685 74.286855-11.586023 34.076539-62.360067 54.181697-63.041597 54.522462a6.133777 6.133777 0 0 0-2.385358 1.703827h-2.726123v2.044593a8.178369 8.178369 0 0 0-2.044592 2.726123V697.546755a6.474542 6.474542 0 0 0 0 2.726124 5.111481 5.111481 0 0 0 0 2.385357 19.423627 19.423627 0 0 0 3.748419 5.452247 80.761398 80.761398 0 0 1 24.194343 58.952412 104.27421 104.27421 0 0 1-58.611648 75.649917z m9.541431 49.751747a147.210649 147.210649 0 0 0 11.586024-27.601997 170.382696 170.382696 0 0 0 48.72945-44.640266 77.012978 77.012978 0 0 1-60.315474 72.242263z" p-id="2160"></path></svg>
其中的类似 M567.374376 424.252912a26.5797 26.5797 0 0 0 …… 数据就是我们需要的路径数据。
我们复制出来这个路径数据,然后在代码中将其转为 Path 数据:
	val pathData = "M567.374376 424.252912a26.5797 26.5797 0 0 0 …… " // 改成完整的 path 数据
	val path = PathParser().parsePathString(pathData).toPath()
最后,正常绘制这个 path 即可:
drawPath(
    path,
    color = Color.White,
    style = Stroke(
        width = paintWidth.toPx(),
    ),
    blendMode = BlendMode.DstOut,
)
这是我使用方法 1 生成的龙宝宝图像:
看起来好像不是太明显,哈哈哈。
自此,所有代码就已经结束了。
这个效果的代码其实并不复杂,但是我却琢磨了两天才琢磨出来,还是因为一开始把简单的问题想复杂了,明明几行代码就能搞定的事,却因为我自己想偏了,愣是写了好久的算法去实现,然后发现无论怎么算,都总是有问题,好在及时发现似乎自己走向了一条错误的道路,赶紧回头,重新梳理了一遍,才发现,原来这么简单。
完整代码见 gist : 完整代码