原文链接:Create a multiplatform app using Ktor and SQLDelight – tutorial
本教程将演示使用 Android Studio 和 Kotlin 基于 Ktor 以及 SQLDelight 创建一个 iOS 以及 Android 的跨平台 APP。
这个 APP 将创建一个共享的代码模块,使得 iOS 和 Android 端的业务逻辑、数据模型在该模块中共享,而 UI 将使用其各自的平台代码。
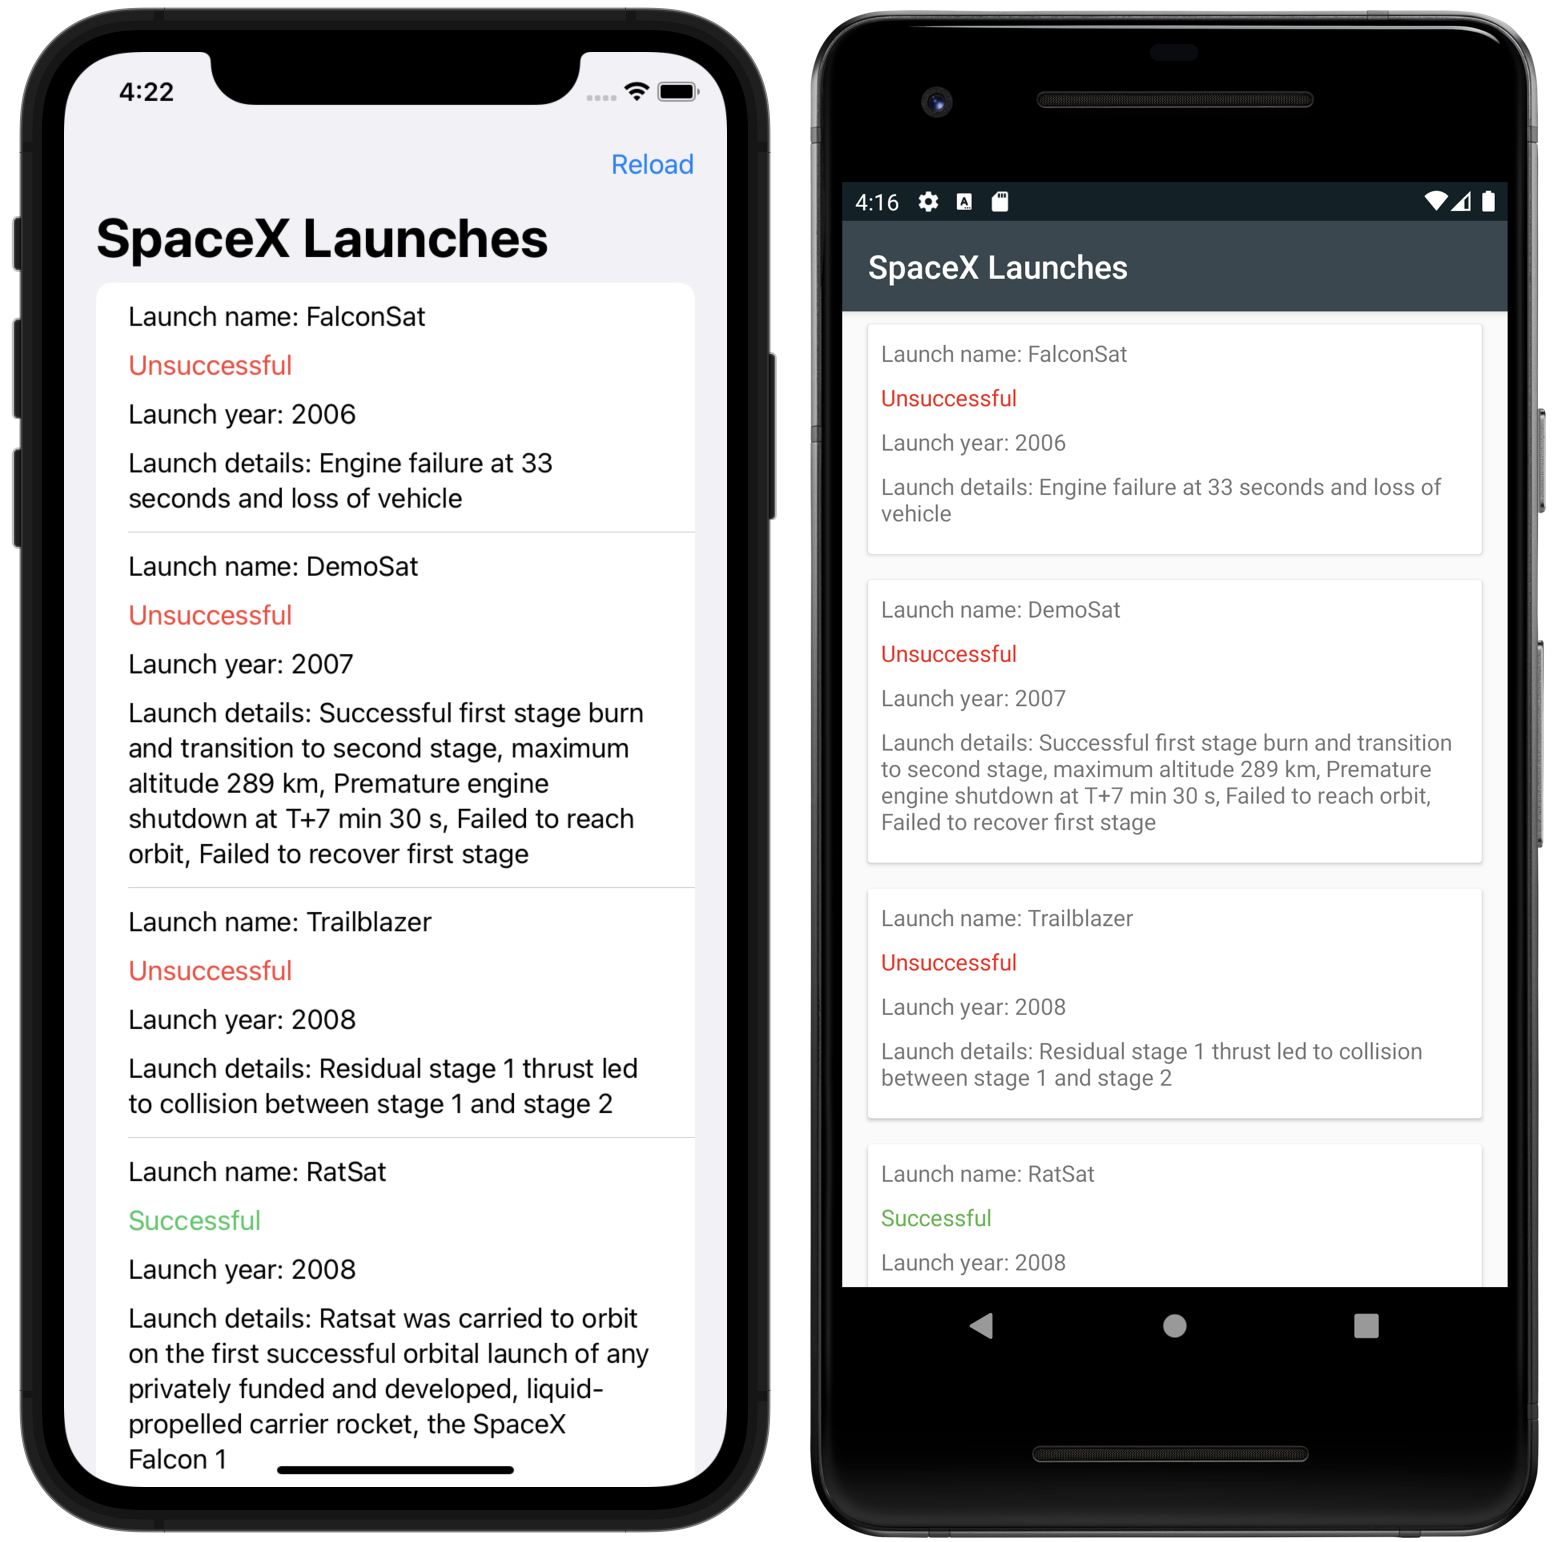
最终成品是一个从 SpaceX API 联网获取数据后,缓存至本地数据库中,然后在 APP 中展示 SpaceX 火箭的发射列表,其中包括发射日期、发射结果和发射的详细数据:
在本教程中,需要使用到以下跨平台库:
- Ktor HTTP 请求库,用于从网络请求数据。
kotlinx.serialization序列化/反序列化 JSON 库。kotlinx.coroutines协程- SQLDelight 用于将 SQL 语句转换为 kotlin 代码并创建类型安全的数据库 API。
开始之前的准备工作
-
下载并安装 Android Studio 。
-
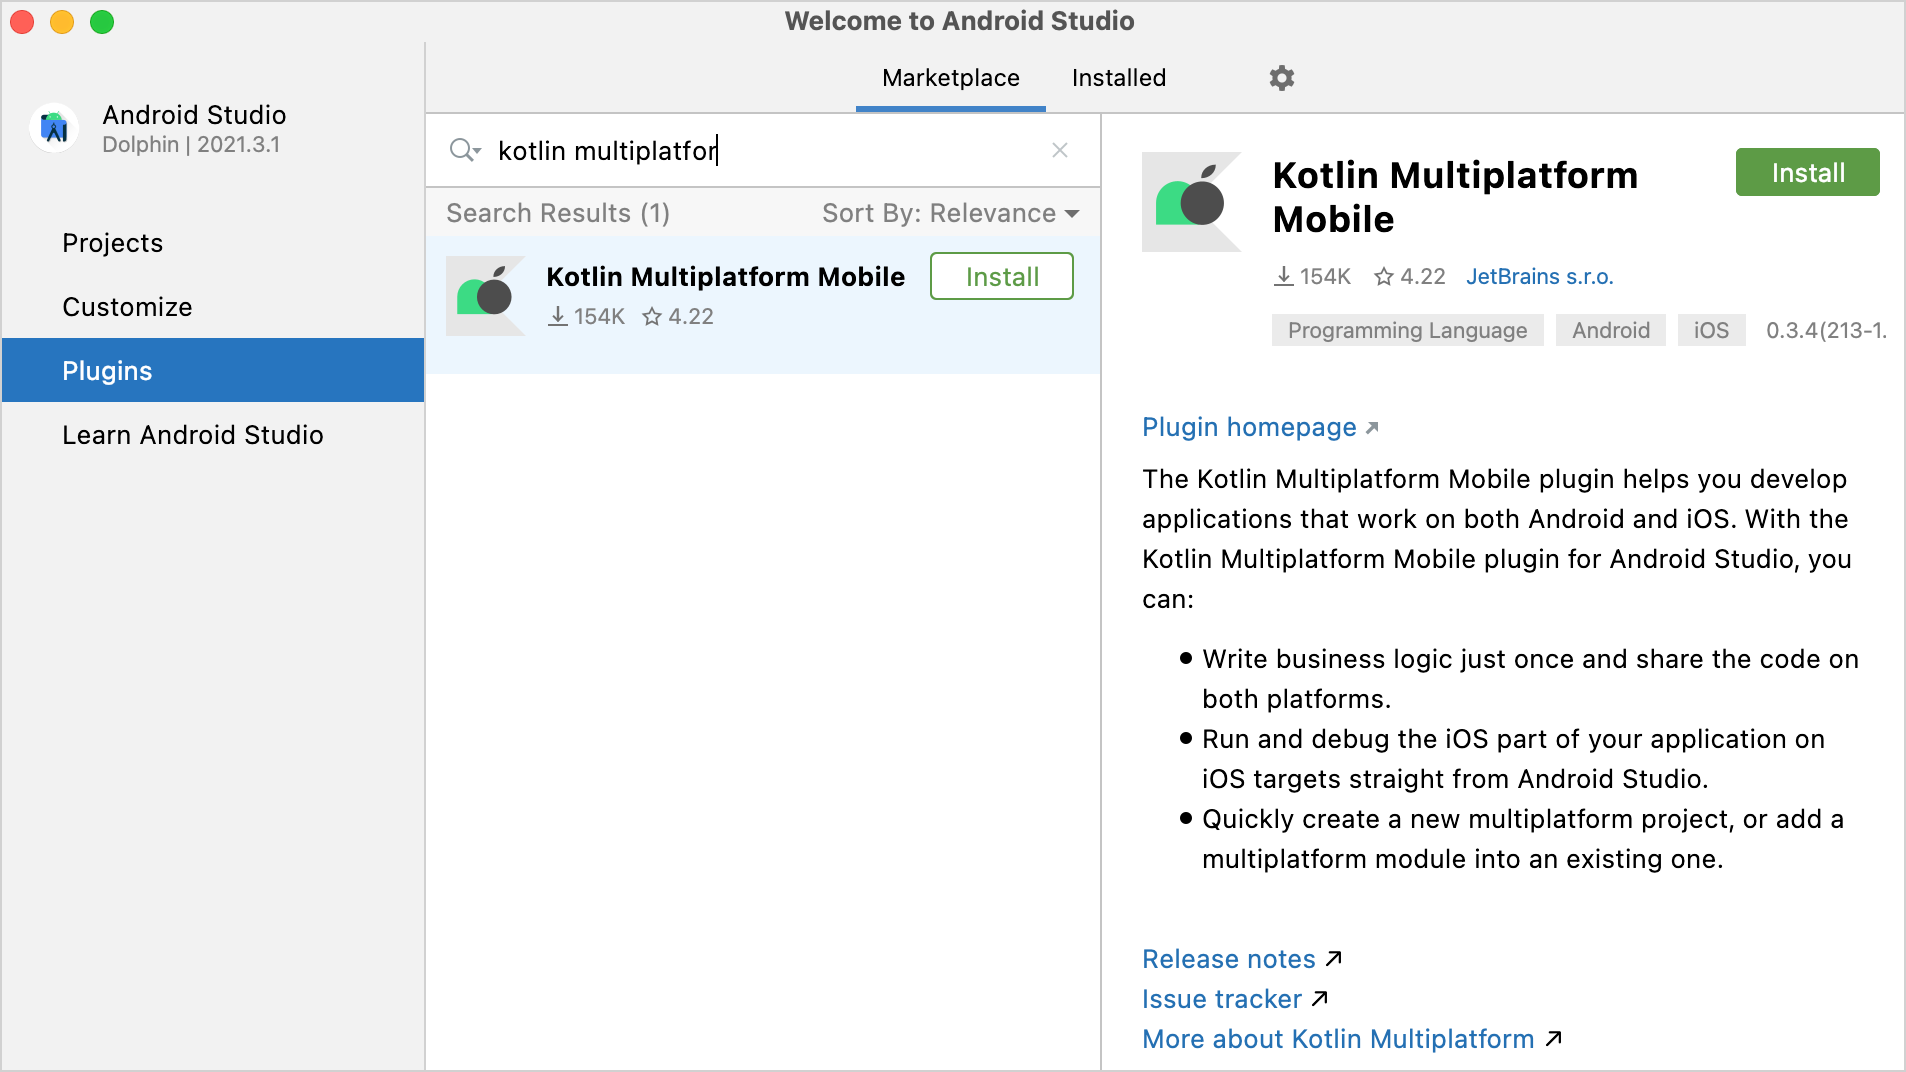
在 Android Studio 插件市场中搜索并安装 Kotlin Multiplatform Mobile plugin 。
-
下载并安装 Xcode.
想要获取更多有关信息,可以查看该教程 : Set up the environment 。
创建一个跨平台项目
-
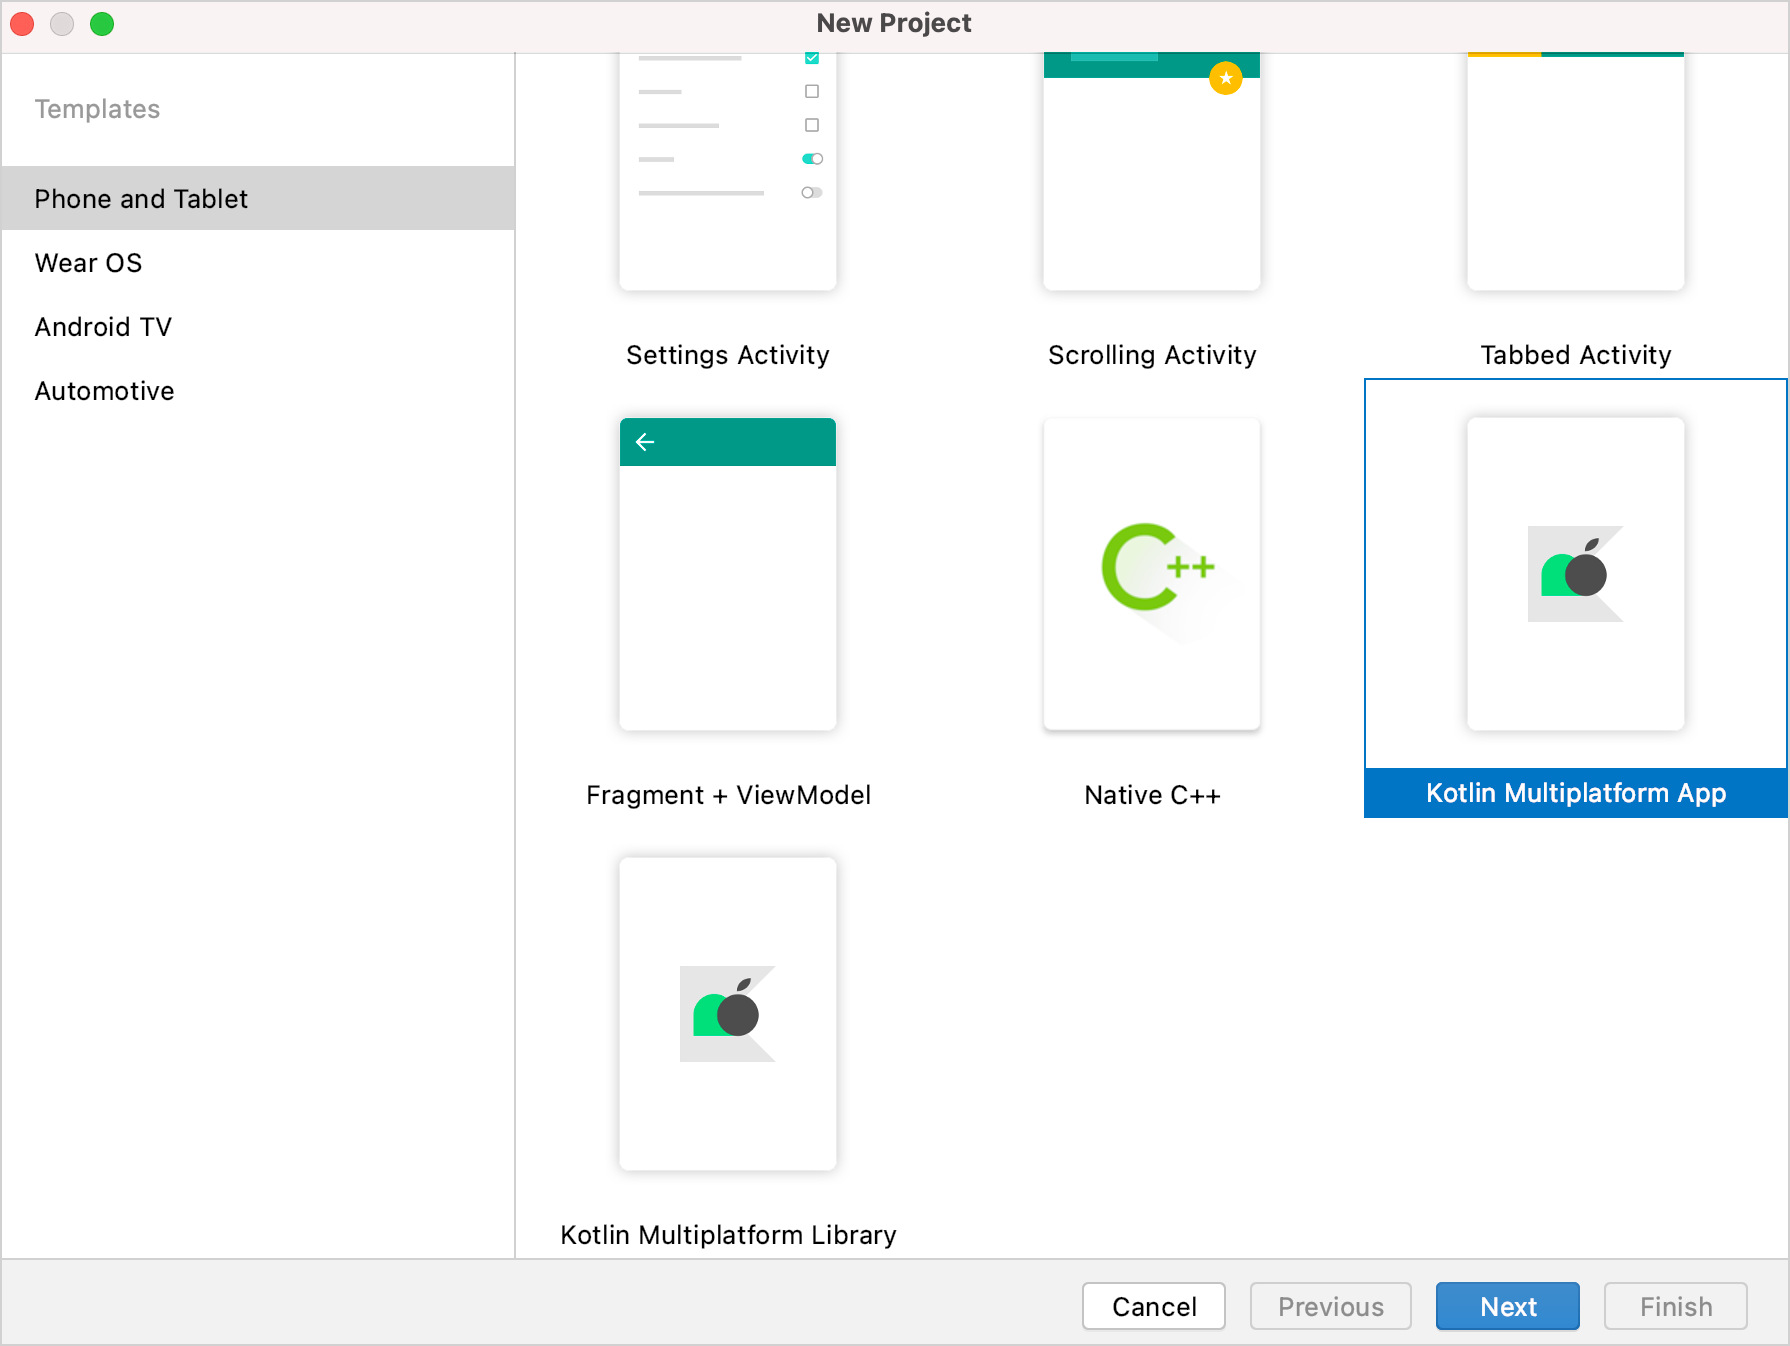
在 Android Studio 中依次点击 File | New | New Project。在项目模版列表页面,选择 Kotlin Multiplatform App ,然后点击 Next.
-
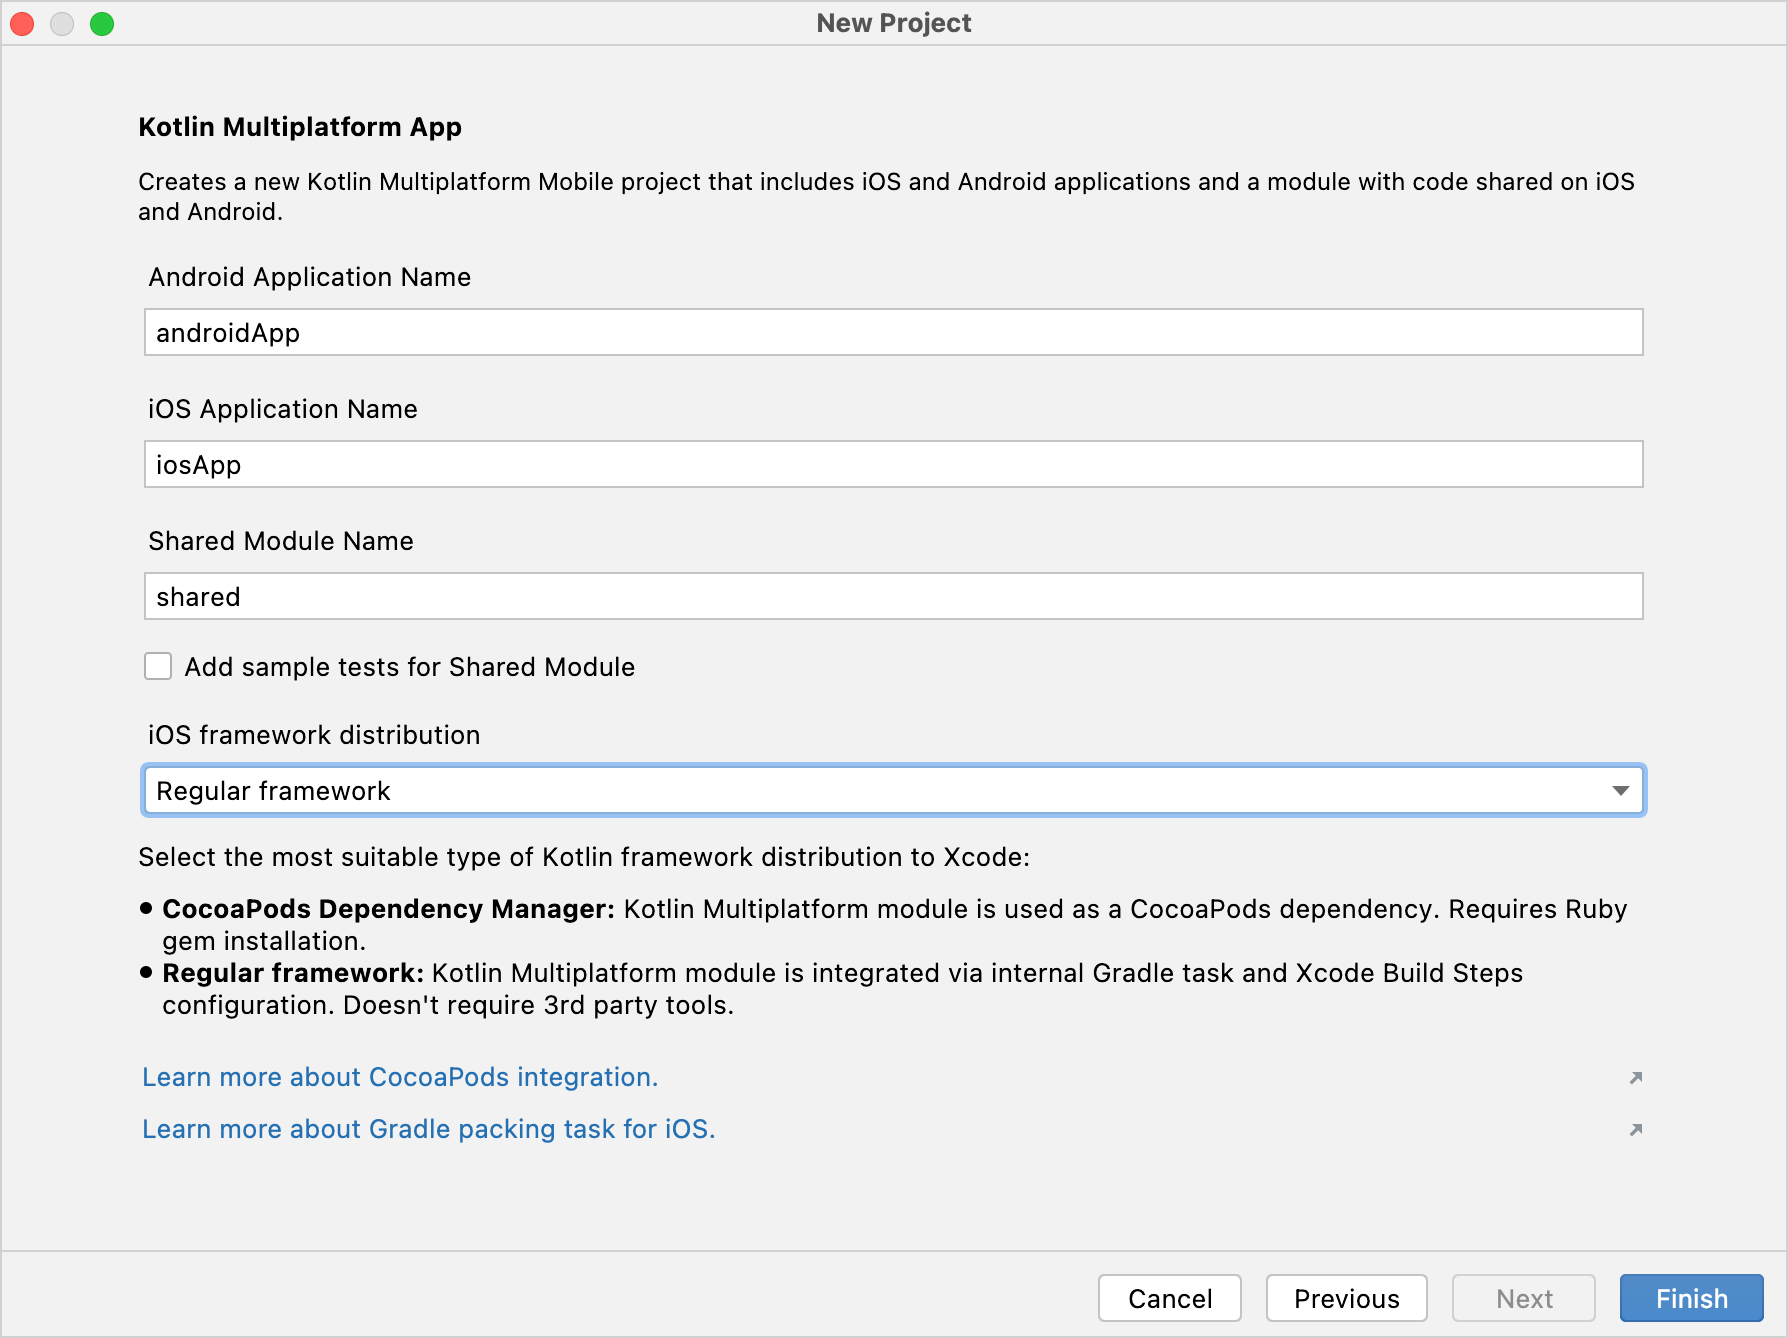
为你的项目命名后点击 Next.
-
在 iOS framework distribution 选项列表中选择 Regular framework 。
-
保持其他选项为默认值,然后点击 Finish.
-
如果想要查看跨平台项目的完整结构,请将视图由 Android 切换至 Project。
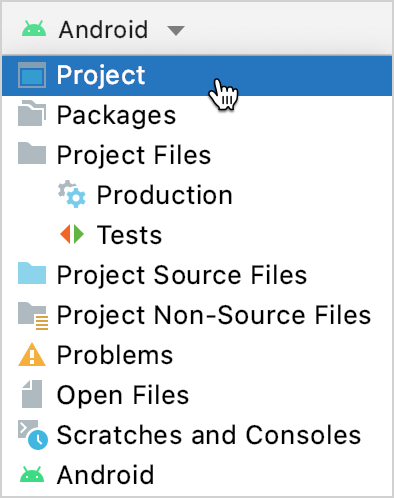
查看更多项目细节以及更多信息,请查阅 Understand the project structure。
你可以在
master分支 上找到已配置完成的项目。
为项目添加依赖
要将跨平台库添加进共享模块中,你需要将不同平台的依赖添加至 build.gradle.kts 文件的不同sourceSets 块中的 dependencies 内。
kotlinx.serialization 与 SQLDelight 库都需要一些额外的配置。
-
在
shared文件夹的build.gradle.kts文件中添加所有需要的依赖库:val coroutinesVersion = "1.6.4" val ktorVersion = "2.2.1" val sqlDelightVersion = "1.5.5" val dateTimeVersion = "0.4.0" sourceSets { val commonMain by getting { dependencies { implementation("org.jetbrains.kotlinx:kotlinx-coroutines-core:$coroutinesVersion") implementation("io.ktor:ktor-client-core:$ktorVersion") implementation("io.ktor:ktor-client-content-negotiation:$ktorVersion") implementation("io.ktor:ktor-serialization-kotlinx-json:$ktorVersion") implementation("com.squareup.sqldelight:runtime:$sqlDelightVersion") } } val androidMain by getting { dependencies { implementation("io.ktor:ktor-client-android:$ktorVersion") implementation("com.squareup.sqldelight:android-driver:$sqlDelightVersion") } } val iosMain by creating { // ... dependencies { implementation("io.ktor:ktor-client-darwin:$ktorVersion") implementation("com.squareup.sqldelight:native-driver:$sqlDelightVersion") } } }- 所有依赖都需要在公共依赖(commonMain)中添加核心库(core)。
- SQLDelight 和 Ktor 库都需要在 iOS(iosMain) 和 Android(androidMain) 依赖中分别添加对应的平台依赖。
- 另外,Ktor 还需要使用 序列化功能
kotlinx.serialization来处理网络请求和响应数据。
-
在
shared文件夹下的build.gradle.kts文件中添加以下代码到plugins块中:
    plugins {
    // ...
    kotlin("plugin.serialization") version "1.8.10"
    id("com.squareup.sqldelight")
}
-
现在打开项目的 根目录 下的
build.gradle.kts文件,并添加编译系统的插件依赖:buildscript { // ... val sqlDelightVersion = "1.5.5" dependencies { // ... classpath("com.squareup.sqldelight:gradle-plugin:$sqlDelightVersion") } } -
最后,在项目 根目录 下的
gradle.properties文件中定义 SQLDelight 版本,注意要和上面步骤 2、3中插件以及依赖的版本一致。sqlDelightVersion=1.5.5 -
同步(Sync)Gradle。
了解更多关于 为跨平台库添加依赖 的信息。
你可以在
final分支 找到这个项目。
创建应用的数据模型
Kotlin 跨平台应用程序将包含公共的 SpaceXSDK 类、网络层和缓存服务。应用程序数据模型将具有三个实体类:
- 关于发射的一般通用信息
RocketLaunch - 外部信息的链接
Links - 火箭的相关信息
Rocket
- 在
shared/src/commonMain/kotlin中,添加com.jetbrains.handson.kmm.shared.entity包 - 在这个包内创建
Entity.kt文件。 - 为所有实体创建数据类:
import kotlinx.serialization.SerialName
import kotlinx.serialization.Serializable

@Serializable
data class RocketLaunch(
    @SerialName("flight_number")
    val flightNumber: Int,
    @SerialName("mission_name")
    val missionName: String,
    @SerialName("launch_year")
    val launchYear: Int,
    @SerialName("launch_date_utc")
    val launchDateUTC: String,
    @SerialName("rocket")
    val rocket: Rocket,
    @SerialName("details")
    val details: String?,
    @SerialName("launch_success")
    val launchSuccess: Boolean?,
    @SerialName("links")
    val links: Links
)

@Serializable
data class Rocket(
    @SerialName("rocket_id")
    val id: String,
    @SerialName("rocket_name")
    val name: String,
    @SerialName("rocket_type")
    val type: String
)

@Serializable
data class Links(
    @SerialName("mission_patch")
    val missionPatchUrl: String?,
    @SerialName("article_link")
    val articleUrl: String?
)
每个可被序列化的类都必须添加 @Serializable 注解。 kotlinx.serialization 插件会自动为添加了 @Serializable 注解的类生成默认的序列化类,除非你通过注释参数显式地将链接传递给序列化程序。
但是,目前的教程中你不需要这样做,@SerialName 注解允许您重新定义字段名称,这将有利于你使用更加易读的名称作为数据类的声明属性。
你可以在
final分支 找到当前代码。
配置SQLDelight并实现缓存逻辑
配置 SQLDelight
SQLDelight 库允许你从 SQL 查询语句中生成类型安全的 kotlin 数据库 API。在编译期间,生成器(generator)验证 SQL 语句并将它们转换为可在共享模块中使用的 Kotlin 代码。
SQLDelight 库已经添加到项目中。想要配置它的话,请打开 shared 文件夹下的 build.gradle.kts 文件,将 sqldelight 代码块添加到文件末尾。该代码块包括数据库列表和对应的参数配置:
sqldelight {
    database("AppDatabase") {
        packageName = "com.jetbrains.handson.kmm.shared.cache"
    }
}
packageName 参数用于指定生成的 kotlin 源码的包名称。
可以考虑安装用于处理
.sq文件的官方 SQLite 插件 。
生成数据库 API
首先,创建用于编写并定义 SQL 语句的 .sq 文件。在默认配置中,SQLDelight 插件将从 sqldelight 文件夹中读取 .sq 文件:
-
在
shared/src/commonMain路径下,创建一个新的sqldelight文件夹,并新建包路径com.jetbrains.handson.kmm.shared.cache。 -
在这个包路径下,创建一个与数据库同名的
.sq文件AppDatabase.sq。APP 中将要用到的所有 SQL 语句都将写在这个文件中。 -
这个数据库将有两个表,分别用来存放 发射 和 火箭 的数据。为了创建这个两个表,需要将以下代码添加进
AppDatabase.sq文件:CREATE TABLE Launch ( flightNumber INTEGER NOT NULL, missionName TEXT NOT NULL, launchYear INTEGER AS Int NOT NULL DEFAULT 0, rocketId TEXT NOT NULL, details TEXT, launchSuccess INTEGER AS Boolean DEFAULT NULL, launchDateUTC TEXT NOT NULL, missionPatchUrl TEXT, articleUrl TEXT ); CREATE TABLE Rocket ( id TEXT NOT NULL PRIMARY KEY, name TEXT NOT NULL, type TEXT NOT NULL ); -
为了实现插入数据,需要编写以下 SQL 插入函数:
insertLaunch: INSERT INTO Launch(flightNumber, missionName, launchYear, rocketId, details, launchSuccess, launchDateUTC, missionPatchUrl, articleUrl) VALUES(?, ?, ?, ?, ?, ?, ?, ?, ?); insertRocket: INSERT INTO Rocket(id, name, type) VALUES(?, ?, ?); -
为了实现清除表数据,定义以下 SQL 删除函数:
removeAllLaunches: DELETE FROM Launch; removeAllRockets: DELETE FROM Rocket; -
同样的,为了检索数据,我们需要定义一些函数。查询 火箭 相关的数据,需要使用它的唯一标志 (id)查询,同时可通过 JOIN 语句关联查询发射信息:
selectRocketById:
SELECT * FROM Rocket
WHERE id = ?;

selectAllLaunchesInfo:
SELECT Launch.*, Rocket.*
FROM Launch
LEFT JOIN Rocket ON Rocket.id == Launch.rocketId;
项目编译完成后,生成的 Kotlin 代码会存放在 shared/build/generated/sqldelight 目录下。生成器将根据 build.gradle.kts 中配置的参数,创建一个名为 AppDatabase 的接口。
创建平台数据库驱动(database drivers)
想要初始化 AppDatabase,需要传递 SqlDriver 实例。SQLDelight 提供了多个特定于平台的 SQLite 驱动程序实现,因此你需要为每个平台单独创建不同的实现。可以通过 expected 和 actual 声明语句 达成这一目的。
-
为数据库驱动创建一个抽象工厂类。为此,需要在
shared/src/commonMain/kotlin目录下, 创建包路径com.jetbrains.handson.kmm.shared.cache,并在该包下创建DatabaseDriverFactory类,并写入以下内容:package com.jetbrains.handson.kmm.shared.cache import com.squareup.sqldelight.db.SqlDriver expect class DatabaseDriverFactory { fun createDriver(): SqlDriver }接下来为 expected 类实现对应的
actual类 -
在安卓中,通过
AndroidSqliteDriver类来实现 SQLite 驱动。需要将数据库信息和上下文以构造参数的形式传递给AndroidSqliteDriver类。为此,在
shared/src/androidMain/kotlin文件夹创建包路径com.jetbrains.handson.kmm.shared.cache,并新建一个DatabaseDriverFactory类文件,写入以下代码来实现actual类:package com.jetbrains.handson.kmm.shared.cache import android.content.Context import com.squareup.sqldelight.android.AndroidSqliteDriver import com.squareup.sqldelight.db.SqlDriver actual class DatabaseDriverFactory(private val context: Context) { actual fun createDriver(): SqlDriver { return AndroidSqliteDriver(AppDatabase.Schema, context, "test.db") } } -
在 iOS 中,通过
NativeSqliteDriver类来实现 SQLite 驱动。在shared/src/iosMain/kotlin文件夹,创建com.jetbrains.handson.kmm.shared.cache包路径,并新建一个DatabaseDriverFactory文件,将以下代码写入,实现 actual` 类:package com.jetbrains.handson.kmm.shared.cache import com.squareup.sqldelight.db.SqlDriver import com.squareup.sqldelight.drivers.native.NativeSqliteDriver actual class DatabaseDriverFactory { actual fun createDriver(): SqlDriver { return NativeSqliteDriver(AppDatabase.Schema, "test.db") } }
这些工厂类的实例稍后将会在您的 Android 和 iOS 项目的代码中被创建。
你可以通过单击编辑器边栏上的 expect 声明和 actual 实现的图标来快速跳转查看:

实现缓存
截至目前,你已经编写了不同平台的数据库驱动以及 AppDatabase 类来执行数据库操作。接下来,我们将创建一个用于封装 AppDatabase 类并实现缓存逻辑的 Database 类。
-
在公共代码目录
shared/src/commonMain/kotlin创建一个com.jetbrains.handson.kmm.shared.cache包路径,并在其中新建一个Database类。这个类的代码将是两个平台通用的。 -
为了 给驱动程序提供
AppDatabase,请将抽象类DatabaseDriverFactory传递给Database类作为其构造参数:package com.jetbrains.handson.kmm.shared.cache import com.jetbrains.handson.kmm.shared.entity.Links import com.jetbrains.handson.kmm.shared.entity.Rocket import com.jetbrains.handson.kmm.shared.entity.RocketLaunch internal class Database(databaseDriverFactory: DatabaseDriverFactory) { private val database = AppDatabase(databaseDriverFactory.createDriver()) private val dbQuery = database.appDatabaseQueries }
这个类的 可见性 修饰符使用的是 internal 这意味着它只能在 multiplatform 模块中使用。
-
在
Database类中,编写一些数据处理操作代码。例如添加一个用于在单个 SQL 事务中清除所有表的函数:internal fun clearDatabase() { dbQuery.transaction { dbQuery.removeAllRockets() dbQuery.removeAllLaunches() } } -
添加一个函数用于获取所有火箭发射列表:
import com.jetbrains.handson.kmm.shared.entity.Links
import com.jetbrains.handson.kmm.shared.entity.Patch
import com.jetbrains.handson.kmm.shared.entity.RocketLaunch

internal fun getAllLaunches(): List<RocketLaunch> {
    return dbQuery.selectAllLaunchesInfo(::mapLaunchSelecting).executeAsList()
}

private fun mapLaunchSelecting(
    flightNumber: Long,
    missionName: String,
    launchYear: Int,
    rocketId: String,
    details: String?,
    launchSuccess: Boolean?,
    launchDateUTC: String,
    missionPatchUrl: String?,
    articleUrl: String?,
    rocket_id: String?,
    name: String?,
    type: String?
): RocketLaunch {
    return RocketLaunch(
        flightNumber = flightNumber.toInt(),
        missionName = missionName,
        launchYear = launchYear,
        details = details,
        launchDateUTC = launchDateUTC,
        launchSuccess = launchSuccess,
        rocket = Rocket(
            id = rocketId,
            name = name!!,
            type = type!!
        ),
        links = Links(
            missionPatchUrl = missionPatchUrl,
            articleUrl = articleUrl
        )
    )
}
传递给 selectAllLaunchesInfo 的参数是一个函数,用于将数据库实体类映射到其他类型,在这里是映射为 RocketLaunch 数据模型类。
-
添加一个函数用于将数据插入数据库:
internal fun createLaunches(launches: List<RocketLaunch>) {
    dbQuery.transaction {
        launches.forEach { launch ->
            val rocket = dbQuery.selectRocketById(launch.rocket.id).executeAsOneOrNull()
            if (rocket == null) {
                insertRocket(launch)
            }

            insertLaunch(launch)
        }
    }
}

private fun insertRocket(launch: RocketLaunch) {
    dbQuery.insertRocket(
        id = launch.rocket.id,
        name = launch.rocket.name,
        type = launch.rocket.type
    )
}

private fun insertLaunch(launch: RocketLaunch) {
    dbQuery.insertLaunch(
        flightNumber = launch.flightNumber.toLong(),
        missionName = launch.missionName,
        launchYear = launch.launchYear,
        rocketId = launch.rocket.id,
        details = launch.details,
        launchSuccess = launch.launchSuccess ?: false,
        launchDateUTC = launch.launchDateUTC,
        missionPatchUrl = launch.links.missionPatchUrl,
        articleUrl = launch.links.articleUrl
    )
}
稍后将创建 Database 类的实例和 SDK 外观类(facade class)。
你可以在
final分支 找到当前项目代码。
实现 API 服务
要通过网络获取数据,你需要通过 SpaceX public API 和一个方法来从 v5/launches 获取所有发射列表数据。
创建一个应用程序链接到 API 的类:
-
在公共代码目录
shared/src/commonMain/kotlin创建一个包路径com.jetbrains.handson.kmm.shared.network,然后在其中创建一个类SpaceXApi:package com.jetbrains.handson.kmm.shared.network import com.jetbrains.handson.kmm.shared.entity.RocketLaunch import io.ktor.client.* import io.ktor.client.call.* import io.ktor.client.plugins.contentnegotiation.* import io.ktor.client.request.* import io.ktor.serialization.kotlinx.json.* import kotlinx.serialization.json.Json class SpaceXApi { private val httpClient = HttpClient { install(ContentNegotiation) { json(Json { ignoreUnknownKeys = true useAlternativeNames = false }) } } }- 这个类执行网络请求并将 JSON 数据反序列化为
entity包中的实体类。Ktor 的HttpClient实例会初始化并储存httpClient属性。 - 这个代码使用了 Ktor
ContentNegotiation插件 来反序列化GET请求结果。该插件将请求和响应内容处理为 JSON 并使用特殊的序列化程序将其序列化或反序列化。
- 这个类执行网络请求并将 JSON 数据反序列化为
-
创建用于获取返回
RocketLaunch数据列表的请求函数,例如:suspend fun getAllLaunches(): List<RocketLaunch> { return httpClient.get("https://api.spacexdata.com/v3/launches").body() }- 这个
getAllLaunches函数加了suspend修饰符,因为它调用的get()函数是一个挂起函数。而这个挂起函数包括对网络请求的异步处理操作,所以只能从另一个挂起函数中被调用。网络请求将在 HTTP 请求线程池中被调用。 - 请求的 URL 会在
get()函数中被定义。
- 这个
添加网络权限
Android APP 想要访问网络的话需要添加适当的权限。由于所有网络请求都是从共享模块发出的,因此需要将联网权限添加到共享模块的清单文件中。
在 androidApp/src/main/AndroidManifest.xml 文件中,将以下权限添加进去:
<?xml version="1.0" encoding="utf-8"?>
<manifest xmlns:android="http://schemas.android.com/apk/res/android" package="com.jetbrains.handson.androidApp">
    <uses-permission android:name="android.permission.INTERNET" />

</manifest>
你可以在
final分支 找到当前项目代码。
构建 SDK
你的 iOS 和 Android 应用程序将通过共享模块与 SpaceX API 通信,共享模块将提供一个公共类。
-
在公共目录下的
com.jetbrains.handson.kmm.shared包中创建一个SpaceXSDK类:package com.jetbrains.handson.kmm.shared import com.jetbrains.handson.kmm.shared.cache.Database import com.jetbrains.handson.kmm.shared.cache.DatabaseDriverFactory import com.jetbrains.handson.kmm.shared.network.SpaceXApi class SpaceXSDK(databaseDriverFactory: DatabaseDriverFactory) { private val database = Database(databaseDriverFactory) private val api = SpaceXApi() }
这个类是 Database 和 SpaceXApi 类的外观类。
-
为了创建
Database类的实例,你需要为其提供DatabaseDriverFactory的不同平台的实例,为此你需要通过SpaceXSDK的构造函数从不同平台的代码中注入。import com.jetbrains.handson.kmm.shared.entity.RocketLaunch @Throws(Exception::class) suspend fun getLaunches(forceReload: Boolean): List<RocketLaunch> { val cachedLaunches = database.getAllLaunches() return if (cachedLaunches.isNotEmpty() && !forceReload) { cachedLaunches } else { api.getAllLaunches().also { database.clearDatabase() database.createLaunches(it) } } }- 这个类包含一个用于获取所有发射信息的函数。根据
forceReload的值,它会返回缓存数据或从网络请求,然后更新缓存。如果没有缓存数据,那它将忽略forceReload值,直接从网络请求数据。 - 你的 SDK 客户端可以使用
forceReload来控制加载关于发射信息的最新的数据,这样可以实现用户下拉刷新。 - 为了处理在 Swift 中 Ktor 产生的异常,这个函数添加了
@Throws注解。
所有的 Kotlin 异常都没有进行出炉, Swift 也只是检查了错误。因此为了让 Swift 能够捕获到预期的异常,Kotlin 应该使用
@Throws注解标记可能发生的异常。 - 这个类包含一个用于获取所有发射信息的函数。根据
你可以在
final分支 上找到当前的代码。
创建安卓应用程序
Android Studio 的 Kotlin Multiplatform Mobile 插件已经为您处理了配置信息,因此 Kotlin Multiplatform 共享模块已经连接到您的 Android 应用程序。
在实现 UI 和编写逻辑代码之前,将所有必需的依赖项添加到 androidApp/build.gradle.kts:
// ...
dependencies {
    implementation(project(":shared"))
    implementation("com.google.android.material:material:1.6.1")
    implementation("androidx.appcompat:appcompat:1.4.2")
    implementation("androidx.constraintlayout:constraintlayout:2.1.4")
    implementation("androidx.swiperefreshlayout:swiperefreshlayout:1.1.0")
    implementation("org.jetbrains.kotlinx:kotlinx-coroutines-android:1.6.2")
    implementation("androidx.core:core-ktx:1.8.0")
    implementation("androidx.recyclerview:recyclerview:1.2.1")
    implementation("androidx.cardview:cardview:1.0.0")
}
// ...
实现UI:展示火箭发射列表
-
为了编写 UI 代码,请在
androidApp/src/main/res文件夹中创建layout/activity_main.xml文件。这个页面基于
ConstraintLayout,并且在其中使用一个SwipeRefreshLayout布局来作为RecyclerView的父布局,并使用FrameLayout显示背景,在中间添加了一个ProgressBar:
<?xml version="1.0" encoding="utf-8"?>
<androidx.constraintlayout.widget.ConstraintLayout xmlns:android="http://schemas.android.com/apk/res/android"
    xmlns:app="http://schemas.android.com/apk/res-auto" android:layout_width="match_parent"
    android:layout_height="match_parent">

    <androidx.swiperefreshlayout.widget.SwipeRefreshLayout android:id="@+id/swipeContainer"
        android:layout_width="match_parent" android:layout_height="match_parent"
        app:layout_constraintBottom_toBottomOf="parent" app:layout_constraintEnd_toEndOf="parent"
        app:layout_constraintStart_toStartOf="parent" app:layout_constraintTop_toTopOf="parent">

        <androidx.recyclerview.widget.RecyclerView android:id="@+id/launchesListRv" android:layout_width="match_parent"
            android:layout_height="match_parent" />

    </androidx.swiperefreshlayout.widget.SwipeRefreshLayout>

    <FrameLayout android:id="@+id/progressBar" android:layout_width="0dp" android:layout_height="0dp"
        android:background="#fff" app:layout_constraintBottom_toBottomOf="parent"
        app:layout_constraintEnd_toEndOf="parent" app:layout_constraintStart_toStartOf="parent"
        app:layout_constraintTop_toTopOf="parent">

        <ProgressBar android:layout_width="wrap_content" android:layout_height="wrap_content"
            android:layout_gravity="center" />

    </FrameLayout>

</androidx.constraintlayout.widget.ConstraintLayout>
-
在
androidApp/src/main/java文件夹中,替换MainActivity类的内容,为 UI 元素添加对应的属性:class MainActivity : AppCompatActivity() { private lateinit var launchesRecyclerView: RecyclerView private lateinit var progressBarView: FrameLayout private lateinit var swipeRefreshLayout: SwipeRefreshLayout override fun onCreate(savedInstanceState: Bundle?) { super.onCreate(savedInstanceState) title = "SpaceX Launches" setContentView(R.layout.activity_main) launchesRecyclerView = findViewById(R.id.launchesListRv) progressBarView = findViewById(R.id.progressBar) swipeRefreshLayout = findViewById(R.id.swipeContainer) } } -
为了使用
RecyclerView,你需要编写一个 adapter (继承自RecyclerView.Adapter)用于将数据填充到布局 UI 中。为此,你需要新建一个LaunchesRvAdapter类:class LaunchesRvAdapter(var launches: List<RocketLaunch>) : RecyclerView.Adapter<LaunchesRvAdapter.LaunchViewHolder>() { override fun onCreateViewHolder(parent: ViewGroup, viewType: Int): LaunchViewHolder { return LayoutInflater.from(parent.context) .inflate(R.layout.item_launch, parent, false) .run(::LaunchViewHolder) } override fun getItemCount(): Int = launches.count() override fun onBindViewHolder(holder: LaunchViewHolder, position: Int) { holder.bindData(launches[position]) } inner class LaunchViewHolder(itemView: View) : RecyclerView.ViewHolder(itemView) { // ... fun bindData(launch: RocketLaunch) { // ... } } } -
在
androidApp/src/main/res/layout/文件夹中创建一个文件item_launch.xml作为列表项布局:
<?xml version="1.0" encoding="utf-8"?>
<androidx.cardview.widget.CardView xmlns:android="http://schemas.android.com/apk/res/android"
    xmlns:app="http://schemas.android.com/apk/res-auto" xmlns:card_view="http://schemas.android.com/tools"
    android:layout_width="match_parent" android:layout_height="wrap_content" android:layout_marginHorizontal="16dp"
    android:layout_marginVertical="8dp" card_view:cardCornerRadius="8dp">

    <androidx.constraintlayout.widget.ConstraintLayout android:layout_width="match_parent"
        android:layout_height="wrap_content" android:paddingBottom="16dp">

        <TextView android:id="@+id/missionName" android:layout_width="0dp" android:layout_height="wrap_content"
            android:layout_margin="8dp" app:layout_constraintEnd_toEndOf="parent"
            app:layout_constraintStart_toStartOf="parent" app:layout_constraintTop_toTopOf="parent" />

        <TextView android:id="@+id/launchSuccess" android:layout_width="0dp" android:layout_height="wrap_content"
            android:layout_margin="8dp" app:layout_constraintEnd_toEndOf="parent"
            app:layout_constraintStart_toStartOf="parent" app:layout_constraintTop_toBottomOf="@+id/missionName" />

        <TextView android:id="@+id/launchYear" android:layout_width="0dp" android:layout_height="wrap_content"
            android:layout_margin="8dp" app:layout_constraintEnd_toEndOf="parent"
            app:layout_constraintStart_toStartOf="parent" app:layout_constraintTop_toBottomOf="@+id/launchSuccess" />

        <TextView android:id="@+id/details" android:layout_width="0dp" android:layout_height="wrap_content"
            android:layout_margin="8dp" app:layout_constraintEnd_toEndOf="parent"
            app:layout_constraintStart_toStartOf="parent" app:layout_constraintTop_toBottomOf="@+id/launchYear" />

    </androidx.constraintlayout.widget.ConstraintLayout>

</androidx.cardview.widget.CardView>
- 在
androidApp/src/main/res/values/文件夹中,定义你的程序样式等,或者直接复制下面的内容:
colors.xml:
<?xml version="1.0" encoding="utf-8"?>
<resources>
    <color name="colorPrimary">#37474f</color>
    <color name="colorPrimaryDark">#102027</color>
    <color name="colorAccent">#62727b</color>

    <color name="colorSuccessful">#4BB543</color>
    <color name="colorUnsuccessful">#FC100D</color>
    <color name="colorNoData">#615F5F</color>
</resources>
strings.xml:
<?xml version="1.0" encoding="utf-8"?>
<resources>
    <string name="app_name">SpaceLaunches</string>

    <string name="successful">Successful</string>
    <string name="unsuccessful">Unsuccessful</string>
    <string name="no_data">No data</string>

    <string name="launch_year_field">Launch year: %s</string>
    <string name="mission_name_field">Launch name: %s</string>
    <string name="launch_success_field">Launch success: %s</string>
    <string name="details_field">Launch details: %s</string>
</resources>
styles.xml:
<resources>
    <!-- Base application theme. -->
    <style name="AppTheme" parent="Theme.AppCompat.Light.DarkActionBar">
        <!-- Customize your theme here. -->
        <item name="colorPrimary">@color/colorPrimary</item>
        <item name="colorPrimaryDark">@color/colorPrimaryDark</item>
        <item name="colorAccent">@color/colorAccent</item>
    </style>
</resources>
-
完成
RecyclerView.Adapter:class LaunchesRvAdapter(var launches: List<RocketLaunch>) : RecyclerView.Adapter<LaunchesRvAdapter.LaunchViewHolder>() { // ... inner class LaunchViewHolder(itemView: View) : RecyclerView.ViewHolder(itemView) { private val missionNameTextView = itemView.findViewById<TextView>(R.id.missionName) private val launchYearTextView = itemView.findViewById<TextView>(R.id.launchYear) private val launchSuccessTextView = itemView.findViewById<TextView>(R.id.launchSuccess) private val missionDetailsTextView = itemView.findViewById<TextView>(R.id.details) fun bindData(launch: RocketLaunch) { val ctx = itemView.context missionNameTextView.text = ctx.getString(R.string.mission_name_field, launch.missionName) launchYearTextView.text = ctx.getString(R.string.launch_year_field, launch.launchYear.toString()) missionDetailsTextView.text = ctx.getString(R.string.details_field, launch.details ?: "") val launchSuccess = launch.launchSuccess if (launchSuccess != null ) { if (launchSuccess) { launchSuccessTextView.text = ctx.getString(R.string.successful) launchSuccessTextView.setTextColor((ContextCompat.getColor(itemView.context, R.color.colorSuccessful))) } else { launchSuccessTextView.text = ctx.getString(R.string.unsuccessful) launchSuccessTextView.setTextColor((ContextCompat.getColor(itemView.context, R.color.colorUnsuccessful))) } } else { launchSuccessTextView.text = ctx.getString(R.string.no_data) launchSuccessTextView.setTextColor((ContextCompat.getColor(itemView.context, R.color.colorNoData))) } } } } -
更新
MainActivity类的内容如下:class MainActivity : AppCompatActivity() { // ... private val launchesRvAdapter = LaunchesRvAdapter(listOf()) override fun onCreate(savedInstanceState: Bundle?) { // ... launchesRecyclerView.adapter = launchesRvAdapter launchesRecyclerView.layoutManager = LinearLayoutManager(this) swipeRefreshLayout.setOnRefreshListener { swipeRefreshLayout.isRefreshing = false displayLaunches(true) } displayLaunches(false) } private fun displayLaunches(needReload: Boolean) { // TODO: Presentation logic } }现在你已经创建了
LaunchesRvAdapter实例,配置好了RecyclerView并且实现了LaunchesListView的接口。如果想要实现下拉刷新手势,可以为SwipeRefreshLayout添加一个监听。
实现显示逻辑
-
从共享模块创建一个
SpaceXSDK类的实例并将DatabaseDriverFactory实例注入:class MainActivity : AppCompatActivity() { // ... private val sdk = SpaceXSDK(DatabaseDriverFactory(this)) } -
实现私有函数
displayLaunches(needReload: Boolean). 在它里面使用主CoroutineScope(协程作用域)启动了一个协程用于运行getLaunches()函数。这个函数可以处理异常、使用 toast 显示错误信息:class MainActivity : AppCompatActivity() { private val mainScope = MainScope() // ... override fun onDestroy() { super.onDestroy() mainScope.cancel() } // ... private fun displayLaunches(needReload: Boolean) { progressBarView.isVisible = true mainScope.launch { kotlin.runCatching { sdk.getLaunches(needReload) }.onSuccess { launchesRvAdapter.launches = it launchesRvAdapter.notifyDataSetChanged() }.onFailure { Toast.makeText(this@MainActivity, it.localizedMessage, Toast.LENGTH_SHORT).show() } progressBarView.isVisible = false } } } -
从运行菜单中点击 androidApp ,选择一个模拟器,然后点击运行:
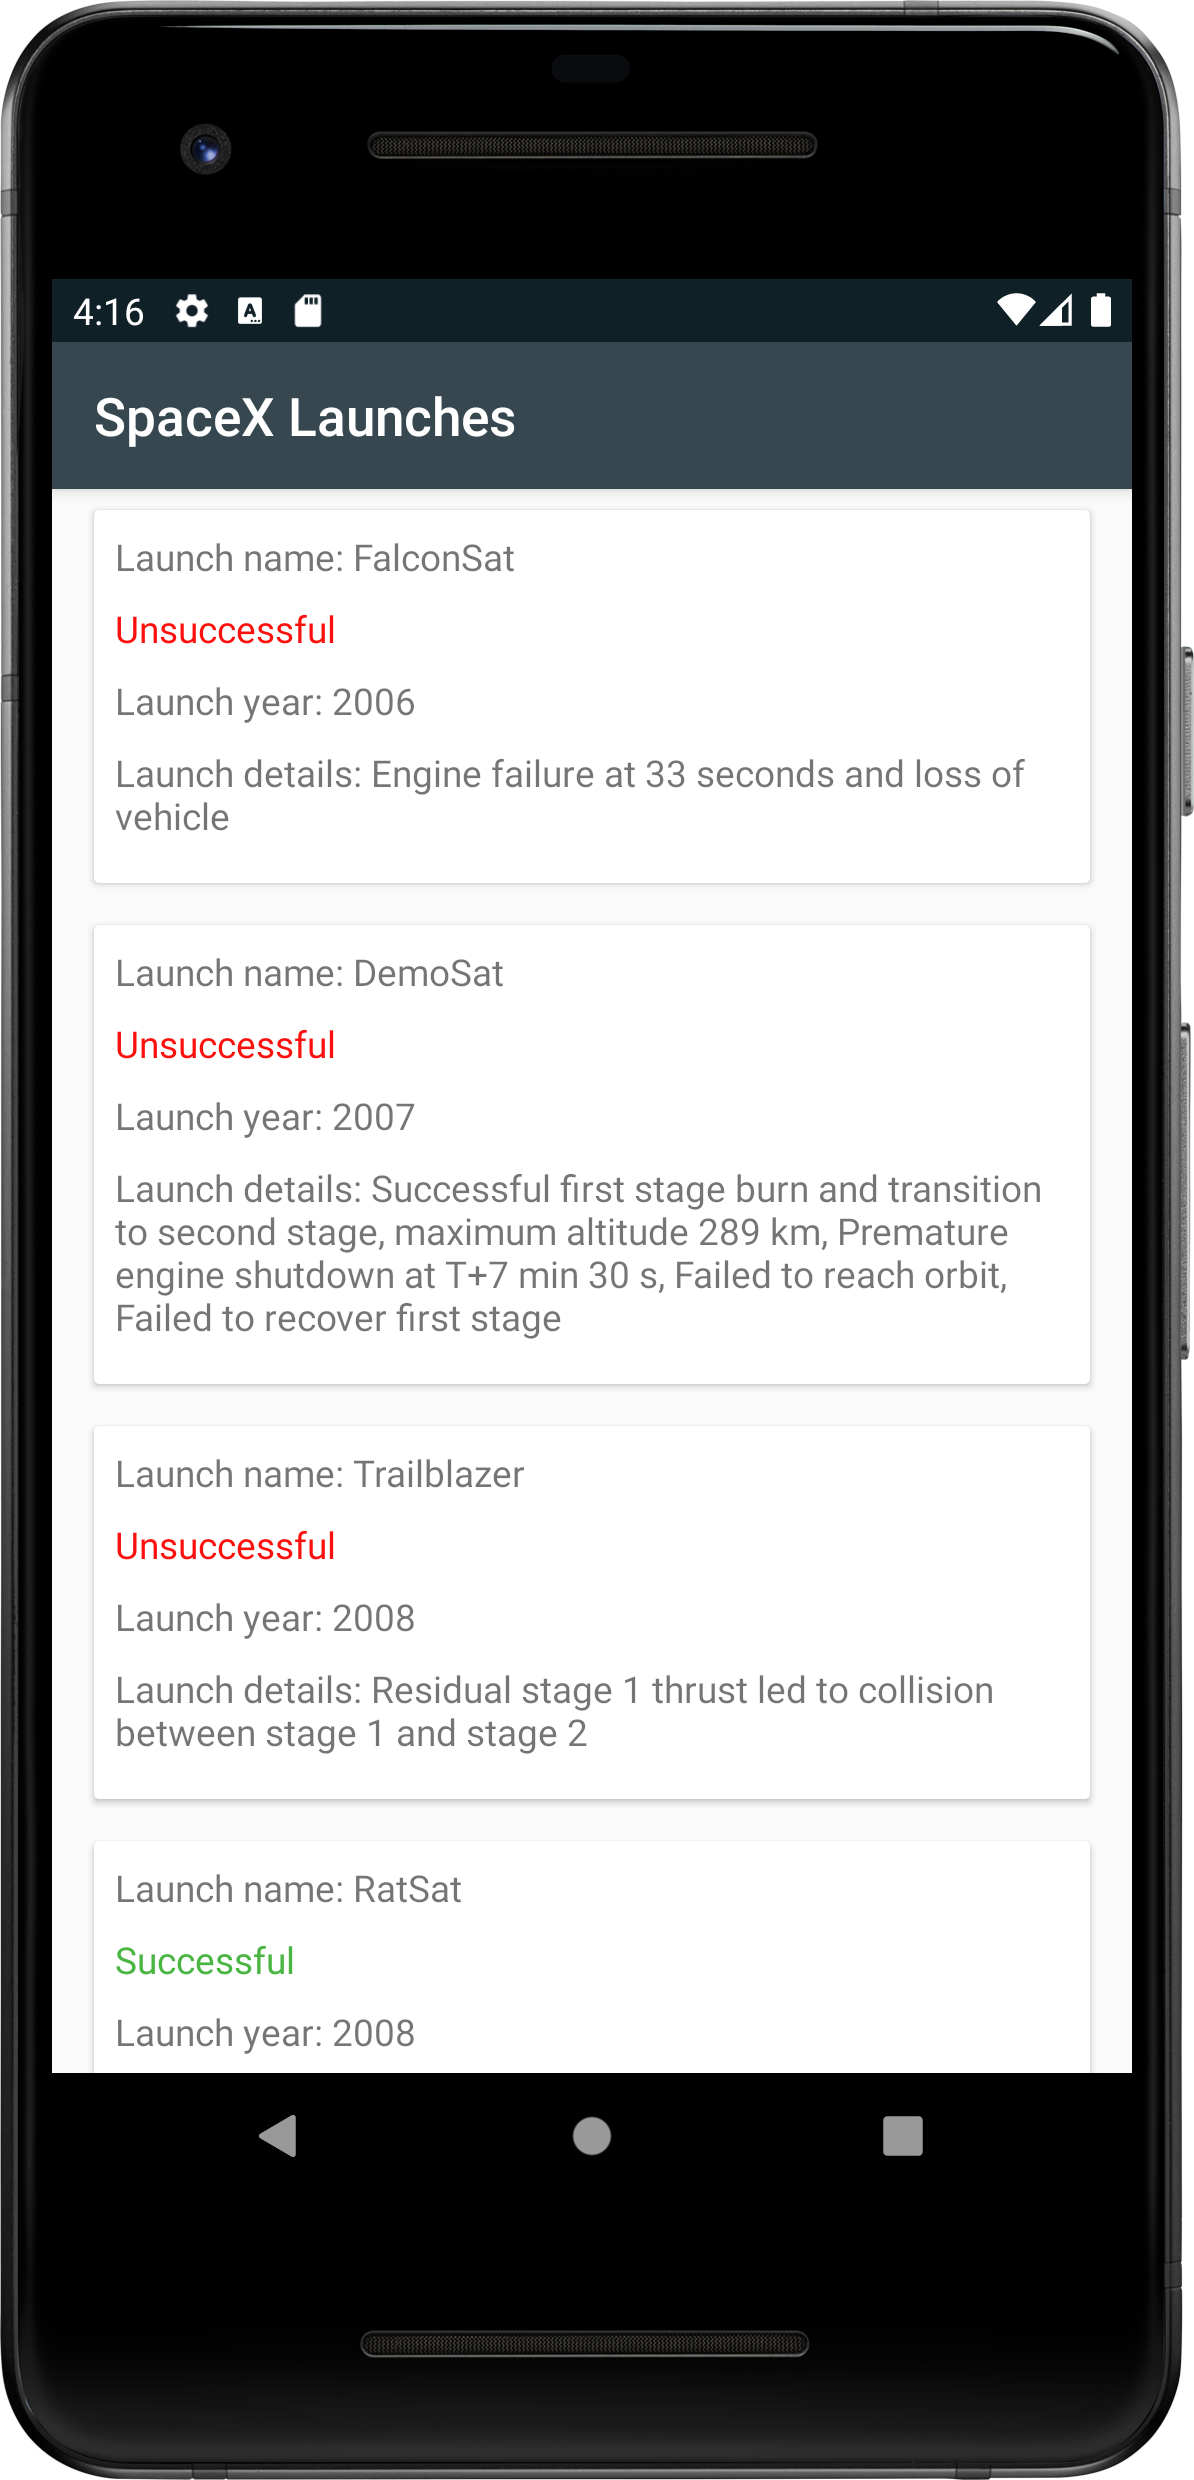
现在,你完成了一个 Android APP,它的业务逻辑在 Kotlin Multiplatform Mobile 模块中实现。
你可以在
final分支 找到当前项目代码。
创建 iOS 应用程序
对于 iOS 程序,你将使用 SwiftUI 来构建 UI,并使用 “Model View View-Model” 架构来连接包含所有业务逻辑的共享模块。
共享模块已经连接到 iOS 项目,因为 Android Studio 插件已完成所有配置。你可以像导入常规 iOS 依赖项一样导入它:import shared.
实现UI
首先,你需要创建一个名为 RocketLaunchRow 的 SwiftUI 界面来显示列表项。它将基于 HStack 和 VStack 控件。我们会扩展 RocketLaunchRow 结构,以助于显示数据。
-
打开你的 Xcode 然后选择 Open a project or file.
-
找到你的项目,然后选择
iosApp文件夹。 点击 Open. -
在 Xcode 项目中,创建一个类型为 SwiftUI View 的 swift 文件,并将其命名为
RocketLaunchRow,最后写入以下代码:import SwiftUI import shared struct RocketLaunchRow: View { var rocketLaunch: RocketLaunch var body: some View { HStack() { VStack(alignment: .leading, spacing: 10.0) { Text("Launch name: \(rocketLaunch.missionName)") Text(launchText).foregroundColor(launchColor) Text("Launch year: \(String(rocketLaunch.launchYear))") Text("Launch details: \(rocketLaunch.details ?? "")") } Spacer() } } } extension RocketLaunchRow { private var launchText: String { if let isSuccess = rocketLaunch.launchSuccess { return isSuccess.boolValue ? "Successful" : "Unsuccessful" } else { return "No data" } } private var launchColor: Color { if let isSuccess = rocketLaunch.launchSuccess { return isSuccess.boolValue ? Color.green : Color.red } else { return Color.gray } } }发射列表数据将显示在创建的
ContentView中。 -
为
ContentView创建一个ViewModel类,它将用于准备和管理数据。并将其声明为ContentView的扩展,然后添加如下代码到ContentView.swift文件中:// ... extension ContentView { enum LoadableLaunches { case loading case result([RocketLaunch]) case error(String) } class ViewModel: ObservableObject { @Published var launches = LoadableLaunches.loading } }- Combine 框架 将视图模型 (
ContentView.ViewModel) 与视图建立了关联 (ContentView)。
- Combine 框架 将视图模型 (
-
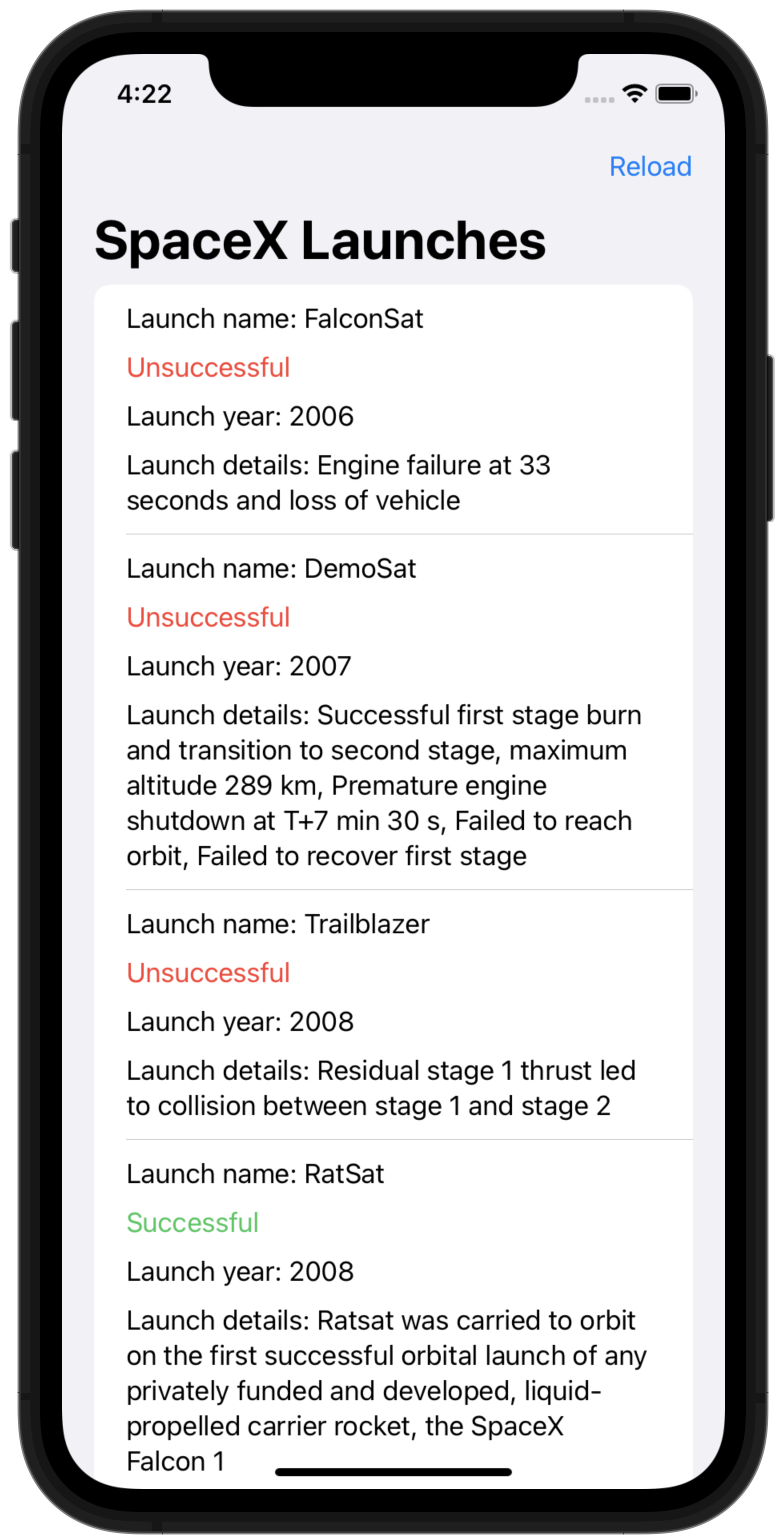
实现
ContentView文件,并显示发射列表:struct ContentView: View { @ObservedObject private(set) var viewModel: ViewModel var body: some View { NavigationView { listView() .navigationBarTitle("SpaceX Launches") .navigationBarItems(trailing: Button("Reload") { self.viewModel.loadLaunches(forceReload: true) }) } } private func listView() -> AnyView { switch viewModel.launches { case .loading: return AnyView(Text("Loading...").multilineTextAlignment(.center)) case .result(let launches): return AnyView(List(launches) { launch in RocketLaunchRow(rocketLaunch: launch) }) case .error(let description): return AnyView(Text(description).multilineTextAlignment(.center)) } } }@ObservedObject用于订阅视图模型 -
为了能够进行正常编译,
RocketLaunch需要配置Identifiable协议,用于初始化 Swift UIVIew 的List。RocketLaunch已经有一个名为id的属性,因此需要将以下内容添加到ContentView.swift文件中:extension RocketLaunch: Identifiable { }
加载数据
为了能够在视图模型中获取到火箭发射的数据,你需要一个来自 Multiplatform 库的 SpaceXSDK 实例。
-
在
ContentView.swift中,通过构造参数传入:extension ContentView { // ... class ViewModel: ObservableObject { let sdk: SpaceXSDK @Published var launches = LoadableLaunches.loading init(sdk: SpaceXSDK) { self.sdk = sdk self.loadLaunches(forceReload: false) } func loadLaunches(forceReload: Bool) { // TODO: retrieve data } } } -
从
SpaceXSDK类中调用getLaunches()函数以保存结果到launches中:func loadLaunches(forceReload: Bool) { self.launches = .loading sdk.getLaunches(forceReload: forceReload, completionHandler: { launches, error in if let launches = launches { self.launches = .result(launches) } else { self.launches = .error(error?.localizedDescription ?? "error") } }) }- 当你将 Kotlin 模块编译到 Apple 框架中时,挂起函数 可以作为带有回调 (
completionHandler)的函数来使用。 - 因为
getLaunches函数被标记了@Throws(Exception::class)注解,所以所有Exception异常或其子类的异常都将被视为NSError。因此,所有此类的异常都可以在completionHandler中处理。
- 当你将 Kotlin 模块编译到 Apple 框架中时,挂起函数 可以作为带有回调 (
-
打开 APP 的入口函数:
iOSApp.swift,在其中初始化 SDK,布局和视图模型:import SwiftUI import shared @main struct iOSApp: App { let sdk = SpaceXSDK(databaseDriverFactory: DatabaseDriverFactory()) var body: some Scene { WindowGroup { ContentView(viewModel: .init(sdk: sdk)) } } } -
在 Android Studio 中,切换到 iosApp 配置,选择一个模拟器,然后运行:
你可以在
final分支 找到当前项目代码。